-8")


When rain shows up on a wedding day, it’s easy to feel stressed about creating beautiful images. But here’s the truth – some of our favorite wedding photos have come from rainy days. We’re about to share practical techniques that will help you handle wet weather with confidence, using gear you already own and locations every venue offers.
If you’re just starting out, investing in the right wedding photography gear can make a huge difference in low-light and unpredictable conditions. But beyond equipment, success in wedding photography comes down to experience and adaptability. If you’re still building your career, learning how to become a wedding photographer with a strong portfolio and smart shooting techniques will set you up for success. Of course, even the best skills won’t matter if you don’t have a steady stream of bookings, which is why knowing how to get wedding photography clients is just as important as mastering your camera. And let’s not forget that rainy days aren’t just about portraits—some of the most heartfelt moments happen indoors. Mastering wedding getting ready photos in beautifully lit spaces ensures you capture the full story, no matter the weather.
Now let’s dive in!
Table of Contents
Using Natural Light Through Windows and Doorways
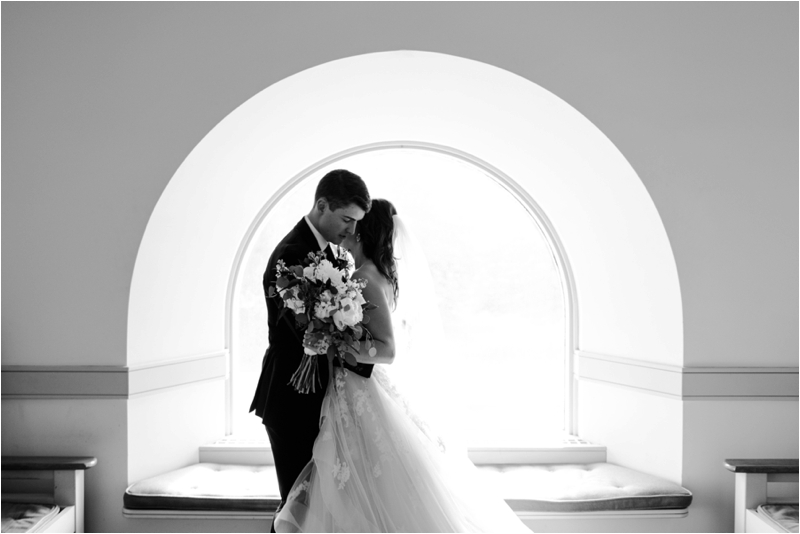
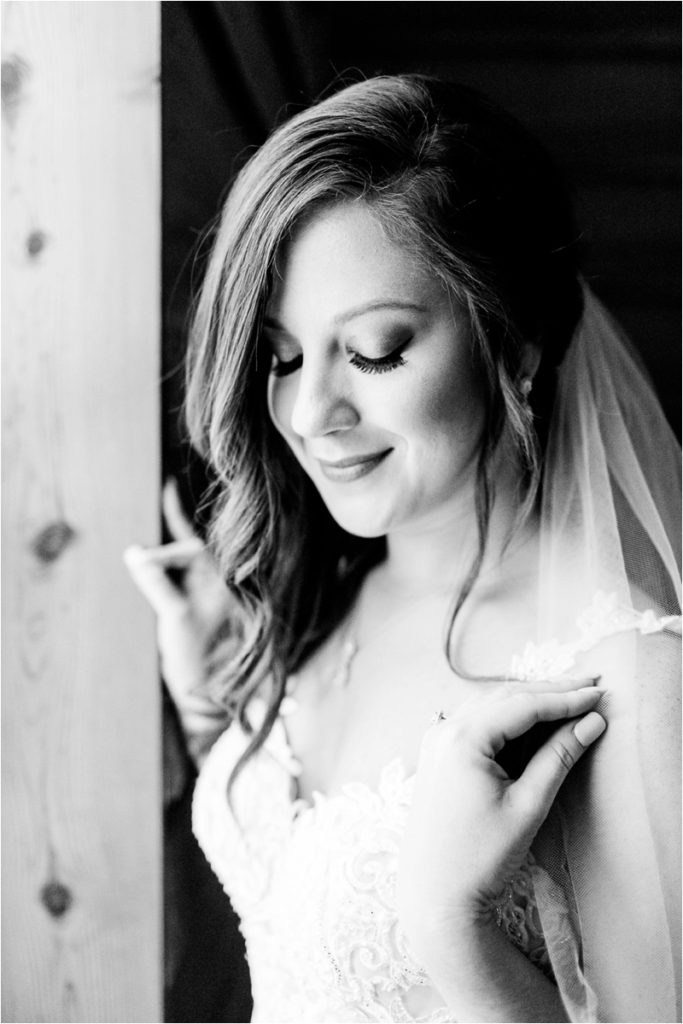
Rainy days create some of the most beautiful natural light for photography, but you need to know where to look for it. Large windows and doorways become massive soft boxes, creating perfect lighting conditions for portraits and group shots.
The key is understanding how to position your subjects relative to these light sources. We’ve found that placing couples about 6-8 feet away from large windows gives you that dreamy, diffused light that clients love. The overcast sky actually works in your favor here, acting as a giant diffuser and eliminating harsh shadows.
Position your subjects at a 45-degree angle to the window or doorway. This creates natural shadows that add depth to faces while maintaining bright catch lights in the eyes. Remember to expose for the skin tones – let those rainy skies go bright if needed.
Creating Stunning Portrait Angles Under Cover
Every venue has covered areas that become prime shooting locations during rain. The trick is knowing how to use these spaces creatively instead of just hiding from the weather. Porches, awnings, and covered walkways aren’t just shelter – they’re opportunities for unique compositions.
Look for leading lines in these covered areas. Pillars, railings, and architectural details can frame your subjects perfectly. We’ve discovered that shooting parallel to covered walkways, rather than straight on, creates more interesting depth in your images.
A simple technique we use is to position couples just at the edge of covered areas, where they’re completely dry but can still interact with the environment behind them. This creates a perfect balance of comfort and atmosphere in your images.
Simple Lighting Tips Using One Flash
You don’t need complicated lighting setups to create dramatic rainy day photos. One flash and a basic knowledge of manual settings will let you capture stunning images in any weather. Here’s what works consistently with minimal gear.
The most effective technique we’ve found is positioning your flash at a directly behind your subjects. Set your flash to about 1/4 power as a starting point, then adjust based on your distance. This creates a subtle rim light that separates your subjects from dark backgrounds while illuminating raindrops…or you could do this without rain.
Camera settings that work reliably in the rain:
- Shutter speed: 1/160 (sync speed)
- Aperture: f/2.8
- ISO: 400
- Flash: 1/4 power directly behind the subject
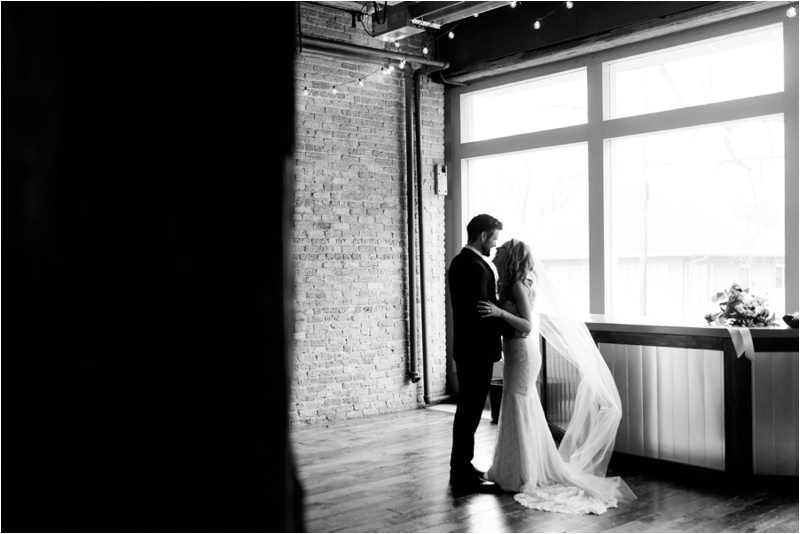
Making the Most of Hotel and Venue Spaces
Indoor spaces don’t have to look boring or cramped in your photos. The key is finding and using existing features that add depth and interest to your compositions. Every venue has these spots – you just need to know what to look for.
Start by scouting for varied light sources. Hotel lobbies often have interesting ceiling fixtures that create depth. Venue hallways frequently have wall sconces that can serve as hair lights. Even standard overhead lights can be used creatively if you know how to position your subjects.
Look for reflective surfaces like marble floors, mirrors, or glass walls. These elements add dimension to your shots and can make small spaces appear larger. We often use these surfaces to create subtle reflections of the couple, adding layers to otherwise simple compositions.
Pro tip: Don’t try to hide the fact you’re indoors. Instead, use interior elements intentionally in your composition. Modern venues often have architectural details or artwork that can add context and interest to your images.
Rainy Day First Look Strategies
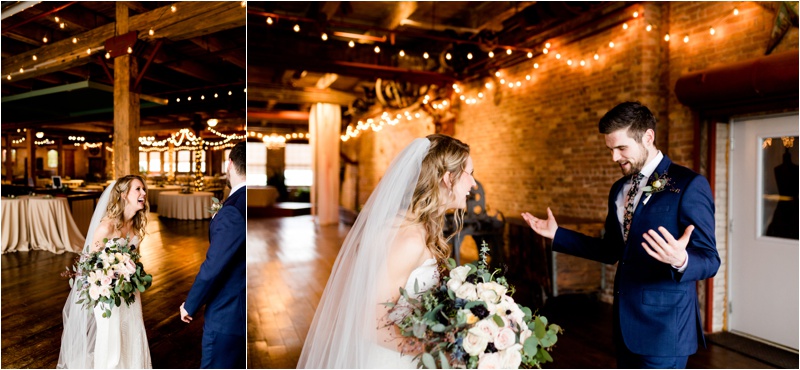
First looks on rainy days need a different approach, but they can actually create more intimate and dramatic moments than their sunny counterparts. The key is choosing locations that offer both coverage and creative opportunities for memorable images.
Pro tip: Always have your second shooter positioned to capture the opposite angle. While you’re photographing the approaching partner’s face, they should be capturing the waiting partner’s reaction. This gives you a complete story of the moment from both perspectives.
When scouting first look locations during rain, look for covered areas that have open sides. Hotel porte-cochères, venue entranceways, and large porches give you the perfect combination of protection and natural light. The covered area keeps your couple dry while the open sides provide that beautiful, diffused lighting that makes skin tones glow.
One of our favorite techniques is positioning the person waiting for the first look near the outer edge of a covered area, while having their partner approach from inside. This creates a gorgeous light gradient as they move toward each other, and the sound of rain adds an extra element of anticipation to the moment.
Camera settings that consistently work for rainy first looks:
- Aperture: f/1.8 for dramatic background blur
- Shutter: 1/500 to freeze any visible raindrops
- ISO: Start at 400 and adjust based on available light
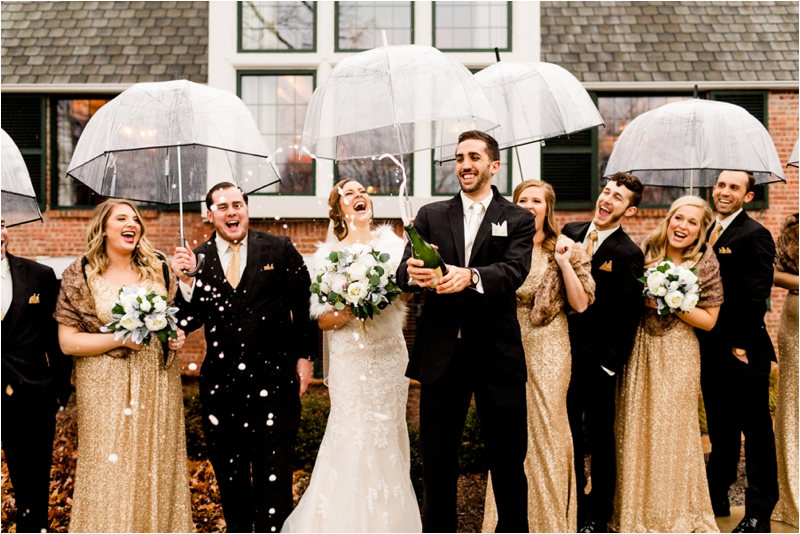
When it comes to incorporating umbrellas, less is more. Instead of using them as props, have your assistant hold an umbrella over you while shooting, allowing the couple to move naturally. If umbrellas are needed for the couple, opt for clear ones that won’t block their faces or cast odd colors on skin tones.
The goal with rainy day first looks isn’t to pretend it’s not raining – it’s to use the weather to create images that feel intimate and intentional. These techniques work in any venue, with any camera system, and don’t require expensive specialty gear. The key is understanding how to use what’s already available to create moments that feel special rather than compromised.
By mastering these practical approaches, you’ll find yourself looking forward to rainy wedding days as opportunities to create something unique. Your confidence will show in your images and, more importantly, will help your couples embrace whatever weather their wedding day brings.

-12")


