-8")


Nailing the perfect shutter speed isn’t only about avoiding blur—it’s about bringing energy and emotion into every frame. A fast shutter speed freezes movement, like a couple’s twirl on the dance floor, while a slower setting can add a dreamy motion blur to a flowing veil. Finding the right balance starts with knowing your gear inside and out! If you’re still building your kit, check out our favorite wedding photography gear for must-have cameras and lenses. Need help dialing in the perfect settings? Our camera settings guide breaks down what works best for every part of the day. If you’re starting out, our step-by-step guide to becoming a wedding photographer will set you on the right path. And once you’re confident in your skills, don’t miss our tips on booking more wedding photography clients to start growing your business!
Table of Contents
- Understanding Shutter Speed in Wedding Photography
- The Ideal Shutter Speed for Wedding Photography
- Shutter Speed Settings for Various Lighting Conditions
- Optimizing Shutter Speed for Creative Effects
- How Shutter Speed Interacts with Aperture and ISO
- Practical Tips for Setting Shutter Speed During Wedding Shoots
- Common Mistakes to Avoid with Shutter Speed
- FAQs: Addressing Common Concerns about Shutter Speed
- Conclusion: Achieving the Best Results with Shutter Speed
Understanding Shutter Speed in Wedding Photography
Definition and Basics of Shutter Speed
Shutter speed in photography is like a heartbeat—it controls the rhythm of light entering your camera! Think of it as a curtain that opens and closes at different speeds, determining how long your camera’s sensor is exposed to light. In wedding photography, where every moment matters, learning this concept can take your images from good to unforgettable.
Technically speaking, shutter speed is measured in fractions of a second (like 1/200) or full seconds. For most wedding situations, sticking to faster shutter speeds—typically 1/125 or higher—helps lock in sharp, detailed shots. This is especially important when shooting handheld, as it reduces the chance of camera shake and unwanted blur!
How Shutter Speed Affects Exposure and Motion
Shutter speed does two big things for your wedding photos: it controls how much light reaches your sensor and determines how motion is captured!
For fast-moving moments, like a twirling first dance or a groom’s mid-air jump, a faster shutter speed (1/200 or higher) keeps everything sharp! On the flip side, slower shutter speeds can introduce intentional motion blur, adding energy and emotion to a shot. This works beautifully on the dance floor or during a romantic first dance, where a hint of blur can bring movement to life in a way that feels more cinematic!
The Ideal Shutter Speed for Wedding Photography
Finding the right shutter speed for wedding photography is all about balance—blending technical skill with creative vision! While there’s no single perfect setting, knowing the ideal shutter speed for different moments will help you capture every detail with confidence and clarity.
Recommended Shutter Speeds for Different Wedding Moments
Ceremony: Capturing Vows and Reactions
During ceremonies, every subtle expression matters! A shutter speed of at least 1/200 sec for indoor ceremonies and 1/250 sec for outdoor settings helps lock in those emotions without motion blur. If you’re shooting in a dimly lit church or a venue with tricky lighting, try not to dip below 1/125 sec—even if it means bumping up your ISO a bit. Sharp images are always worth it!
Handheld shots in darker venues require extra stability, so following the reciprocal rule (keeping your shutter speed at least as fast as your focal length) can make a big difference. This keeps handshake blur at bay and ensures crisp, clear ceremony images!
First Dance: Balancing Motion and Stillness
The first dance is one of those rare moments where movement and atmosphere come together beautifully! A shutter speed of 1/200 sec is a great starting point—it freezes the action while still letting in enough ambient light to maintain a warm, intimate feel.
For a creative twist, try slightly slower speeds around 1/160 sec to introduce a touch of motion blur in spinning movements. This adds a dreamy, romantic effect while keeping your subjects’ faces sharp!
Party and Dancing: Freezing Fast Action
Receptions are fast, fun, and full of energy—so your shutter speed needs to keep up! I rarely shoot below 1/200 sec, and if the lighting allows, I push it to 1/250 sec or faster to capture guests mid-jump or mid-spin without blur.
Reception lighting can be unpredictable, but if you’re using flash, you’ll have more flexibility to maintain these faster speeds while still getting a well-exposed shot. In darker conditions, raising your ISO is always better than sacrificing shutter speed—a little grain is far better than a motion-smeared image!
Shutter Speed Settings for Various Lighting Conditions
Every wedding venue comes with its own unique lighting challenges, and dialing in the right shutter speed is key to capturing consistent, professional-quality images! Whether you’re working in a dimly lit ballroom or under the bright afternoon sun, knowing how to adjust your settings for different scenarios will keep your shots crisp and well-exposed.
Indoors with Dim Lighting: Avoiding Motion Blur
Indoor venues often present the biggest lighting challenges, but a well-chosen shutter speed can make all the difference! For handheld shots in dim conditions, I never drop below 1/100 sec to avoid camera shake. In darker churches or reception spaces, starting at 1/125 sec provides a good balance of sharpness and light intake.
If you’re using flash indoors, the approach changes slightly! A shutter speed between 1/60 and 1/200 sec works best for balancing ambient light while keeping images sharp. And if the lighting is truly tricky, raising your ISO is always a better choice than slowing your shutter speed too much—it’s the best way to avoid unwanted blur!
Outdoors in Natural Light: Utilizing Bright Conditions
Bright outdoor settings give you more flexibility, but the right shutter speed still plays a big role in capturing clean, vibrant images! For outdoor ceremonies, 1/250 sec or faster helps freeze subtle movements, like a bride adjusting her dress or guests turning to watch the vows. This also helps manage bright sunlight, preventing overexposed highlights.
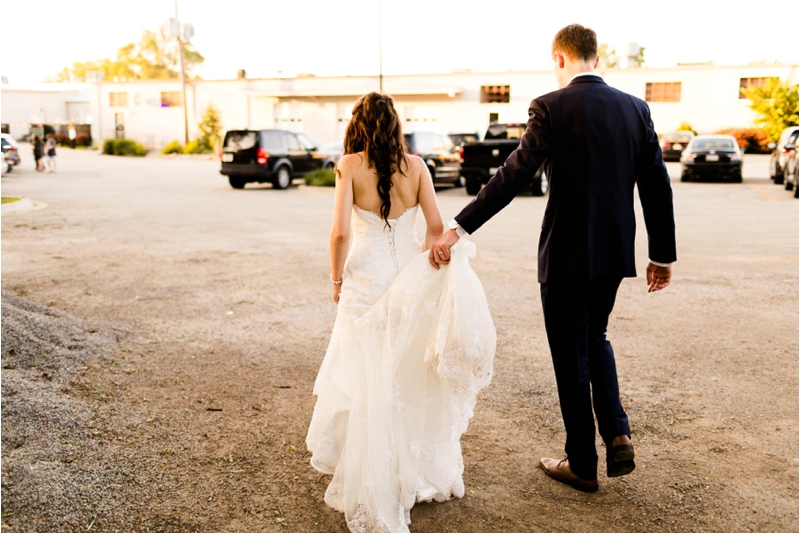
For outdoor portraits, pushing the shutter speed higher—1/500 sec or more—is a great choice, especially when capturing movement! Whether it’s a flowing veil, a couple walking hand-in-hand, or a gust of wind rustling through a dress, a faster shutter speed keeps everything tack-sharp while maintaining proper exposure in bright conditions.
Golden Hour: Capturing Romantic Glows
Golden hour light is remarkable but ever-changing, so adjusting your shutter speed on the fly is key! I typically start around 1/200 sec and tweak as the light softens.
For dreamy sunset portraits, a minimum of 1/125 sec keeps your subjects sharp while preserving that warm, glowing atmosphere. If you’re capturing movement—like a flowing veil catching the breeze—bumping up to 1/250 sec or faster ensures the motion is beautifully frozen while still embracing the golden tones.
Since golden hour light fades quickly, keeping an eye on your exposure is vital! Be ready to adjust your settings gradually to maintain the perfect balance between capturing the soft, romantic feel of the moment and keeping your images crisp and well-lit.
Optimizing Shutter Speed for Creative Effects
Creating Motion Blur for Artistic Shots
Slowing down your shutter speed can introduce a dreamy, artistic touch to your wedding images! For slow shutter speed portraits and creative effects, dropping to 1/30 sec or slower can produce extraordinary results—especially during first dances or romantic reception moments. The trick is keeping your camera steady while allowing selective motion to blur intentionally.
For receptions, shutter drag techniques combined with rear-curtain flash sync can create striking motion effects. Try using speeds between 1/15 and 1/30 sec to capture swirling dance floor energy or beautiful light trails while keeping your subjects crisp! If you’re working with slower speeds, using a tripod or stabilizing against a solid surface helps maintain control over which elements blur and which stay sharp.
Freezing Motion for Clear and Crisp Images
On the other hand, freezing motion requires dialing in faster shutter speeds! For high-energy reception moments—like jumps, twirls, or champagne pops—I typically shoot at 1/500 sec or faster to ensure every detail stays razor-sharp.
When photographing outdoor portraits with flowing veils or dresses, these faster speeds are important. A minimum of 1/250 sec helps freeze fabric movement while keeping a natural flow in elements like hair or clothing. The goal is to find that sweet spot where the image feels dynamic yet maintains professional sharpness where it matters most.
The real magic comes from knowing when to use each technique! Mixing both approaches—freezing key moments with fast shutter speeds while slowing things down for artistic shots—adds depth and variety to your wedding portfolio. By learning these creative choices, you’ll craft images that don’t document the day but bring it to life!
How Shutter Speed Interacts with Aperture and ISO
Balancing the Exposure Triangle
The exposure triangle isn’t a technical concept—it’s your creative toolkit! When choosing an aperture for portraits, I typically start with f/2.8 to f/4 to achieve that soft, blurred background that makes subjects stand out. But with a wide aperture, adjusting shutter speed and ISO becomes important to maintaining proper exposure. (If you are interested in learning more about Aperture Priority Mode, check out our post!)
For example, if I’m shooting outdoor portraits and need to keep a fast shutter speed of 1/250 sec for sharpness, I may need to tweak my ISO to compensate for my chosen aperture. Understanding how these settings interact makes a huge difference, especially when transitioning between different lighting conditions—like stepping from an indoor ceremony into bright outdoor portraits!
Adjusting Shutter Speed While Maintaining Depth of Field
Aperture often drives creative choices in portrait photography—especially when aiming for that dreamy bokeh effect. But a wide aperture like f/1.8 or f/2.0 also means you need to be mindful of shutter speed to ensure sharp focus on your subjects!
Here’s our go-to approach: If I want to maintain a specific depth of field—say, f/2.8 for a couple’s portrait—but the lighting shifts, I adjust my shutter speed first. If that’s not enough, I increase my ISO rather than compromise my chosen aperture. This way, I can preserve the artistic look I want while keeping exposure on point!
These settings work together like a system of checks and balances—when one changes, at least one other needs to shift to keep the exposure right. The goal is to practice these adjustments until they become second nature so you can focus on capturing the moment rather than fumbling with settings!
Practical Tips for Setting Shutter Speed During Wedding Shoots
Learning camera settings for wedding photography isn’t only about memorizing numbers—it’s about staying adaptable to the fast-moving, ever-changing nature of a wedding day! In the next section, I’ll share some practical strategies that have helped me consistently capture the perfect shot, no matter the lighting or movement.
Using Burst Mode and Continuous Shooting
One of the most valuable camera settings for weddings? Burst mode! Whether it’s the first kiss, the bouquet toss, or emotional candid reactions, shooting in high-speed continuous mode ensures you never miss a split-second moment. I typically set my camera to high-speed continuous shooting with a minimum shutter speed of 1/200 sec to keep images sharp while capturing multiple frames in rapid succession.
When using burst mode, getting your exposure settings right from the start makes all the difference! I’ve found that pre-setting a slightly faster shutter speed than you think you’ll need gives you more flexibility. For example, during a ceremony, I often start at 1/250 sec—this way, I can easily adjust down if needed rather than scrambling to increase speed at the last second when something unexpected happens.
Adapting Quickly to Unpredictable Wedding Moments
Weddings move fast, and your camera settings need to keep up! Over time, I’ve developed a system of mental shortcuts for different scenarios:
- Bright sun-filled ceremonies: 1/250 sec or faster
- Poorly lit church: No slower than 1/125 sec
- Reception dancing: Minimum 1/200 sec
Having these baseline settings memorized helps me react instantly when the lighting or action shifts! Weddings are fluid events—one second you’re capturing a quiet vow exchange, and the next, the father-daughter dance is in full swing. That’s why I always keep my thumb near the command dial, ready to tweak shutter speed on the fly.
Pro tip: Practice changing your settings without looking at your camera! Building this muscle memory will be a game-changer when you need to adjust quickly while keeping your eyes on the action. These small technical habits often mean the difference between capturing a perfect moment or missing it entirely!
Common Mistakes to Avoid with Shutter Speed

After photographing countless weddings, I’ve seen firsthand how simple shutter speed mistakes can turn an incredible moment into a blurry disappointment. Go over the most common pitfalls and how to avoid them so your images always meet professional standards!
Dropping Below Safe Handheld Speeds
One of the biggest mistakes? Using a shutter speed that’s too slow for handheld shooting. I’ve learned the hard way that anything below 1/100 sec while shooting handheld almost always introduces subtle motion blur, even with steady hands! This becomes even more critical when using longer lenses, where the minimum shutter speed should match your focal length (e.g., 1/200 sec for a 200mm lens).
A good rule of thumb? Follow the reciprocal rule: your shutter speed should be at least 1/ focal length of your lens. But for weddings, I recommend going even faster to guarantee sharp images. For example, when shooting with a 70-200mm lens, I stay at 1/250 sec or faster—especially during key moments like the ceremony or first dance—to ensure my images stay tack-sharp no matter what!
Over-reliance on Automatic Settings
Modern cameras come with impressive automatic modes, but relying on them too much can lead to missed opportunities and inconsistent results. I’ve seen photographers let their cameras make vital exposure decisions during key moments, only to find their images lack the creative impact they envisioned.
Instead of defaulting to auto, take control of your exposure triangle. Here are my go-to baseline manual settings:
- Indoor ceremonies: At least 1/200 sec
- Outdoor portraits: 1/250 sec or faster
- Reception dancing: Minimum 1/200 sec
- Detail shots: As slow as 1/60 sec (if using a tripod)
When you intentionally adjust your settings based on the scene, you gain the ability to react quickly—without hoping your camera’s auto mode gets it right. This skill becomes especially valuable in those split-second moments when capturing raw emotion or unexpected events.
Automatic modes might give you a properly exposed image, but they won’t necessarily capture the creative vision you have in mind. The more comfortable you become with manual settings, the more consistent and professional your wedding photography will be, and you’ll find yourself capturing more consistent, professional-quality images throughout the wedding day.
FAQs: Addressing Common Concerns about Shutter Speed
Tackle some of the most common questions I get about managing shutter speed during weddings! These tips come from years of trial, error, and experience handling fast-paced, unpredictable moments.
Can I Change Shutter Speed During Live Events?
Absolutely! In fact, adjusting shutter speed on the fly is important. The key is knowing your camera’s shutter speed range and being comfortable making quick adjustments.
During a typical wedding, my settings shift constantly:
- 1/200 sec for ceremonies
- 1/500 sec for outdoor portraits
- 1/250 sec for reception dancing
Here’s my approach: I always keep my right hand on the command dial while maintaining a steady grip on my camera. This allows me to seamlessly transition between different lighting conditions without missing a beat. If I’m moving from a dimly lit church to bright outdoor light, I adjust while walking with the couple so I’m ready to shoot the second we step outside!
What if I Miss a Shot Due to Slow Shutter Speed?
It happens! Even the most experienced photographers miss shots sometimes—but there are ways to minimize the risk.
First, I always start with a safe, conservative shutter speed—typically no slower than 1/200 sec in most wedding situations. This gives me a solid baseline to work from.
- If you miss a shot, don’t panic! Instead, use these preventive strategies:
- Shoot in burst mode during high-action moments
- Pre-adjust your settings before key shots (like the first kiss or exit)
- Have a second camera ready with different settings for quick transitions
- Practice quick adjustments during slower moments to build confidence
The key is learning from these moments and adapting your approach for future weddings. Over time, you’ll develop an intuitive sense of the right settings for any situation—making missed shots rare!u’ll develop an intuitive sense for the right settings in any given situation, making missed shots increasingly rare.
Conclusion: Achieving the Best Results with Shutter Speed
Learning shutter speed in wedding photography is a lot like learning to dance—it takes technical skill, plenty of practice, and the ability to adapt gracefully to changing conditions. Throughout this blog post, we’ve explored how this one setting can be the difference between an ordinary snapshot and an unforgettable wedding image.
But understanding shutter speed is only the beginning! By keeping your settings dialed in—a minimum of 1/200 sec for ceremonies, 1/250 sec or faster for outdoor portraits, and thoughtful adjustments for reception lighting—you’ll build a solid foundation for capturing every moment with confidence.
Practice, Prepare, and Stay Ready
The key to success? Practice and preparation. Before your next wedding, take time to experiment with different settings in various lighting conditions. Build muscle memory for quick adjustments so you can react instantly to shifting moments. Weddings are unpredictable, but when you’re prepared, you’ll be ready to capture every spontaneous, once-in-a-lifetime shot!

-12")


