-8")


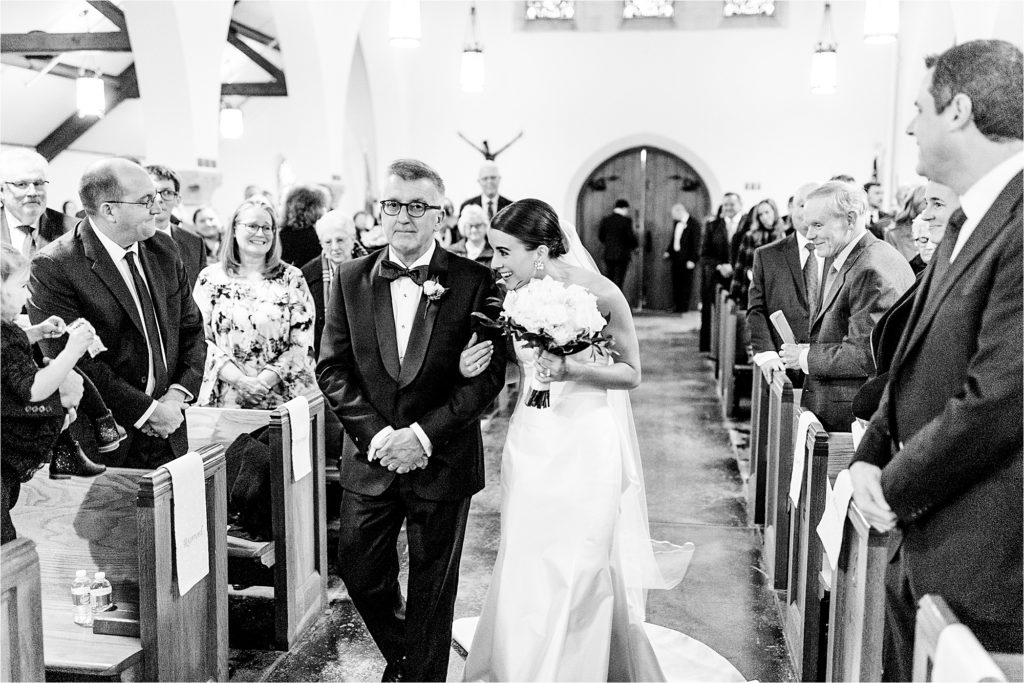
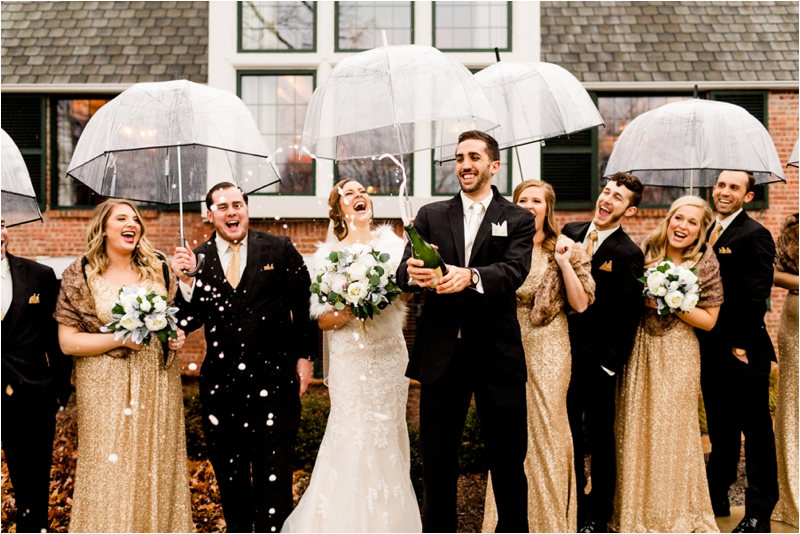
The bride takes a deep breath as she steps into the aisle, the soft glow of stained glass painting colors across her dress. The groom’s face shifts—eyes welling up, lips pressing together to hold back the rush of emotion. For a heartbeat, the entire room seems to pause. These are the moments that can’t be staged, can’t be redone. There’s only one chance to capture them, and that means your settings need to be spot on.
The difference between a nice photo and one that truly brings a moment back to life often comes down to understanding your camera inside and out. Whether you’re stepping into wedding photography for the first time or refining your skills, the ability to anticipate and adapt makes all the difference. Because in the end, the best images aren’t just seen—they’re felt.
Every wedding tells a different story—some unfold in grand ballrooms with dramatic lighting, while others take place under open skies with the sun dipping below the horizon. No matter the setting, preparation is everything. If you’re just starting out and learning how to become a wedding photographer it is so important to have the right tools. A fast, versatile lens—like the best prime lenses for Canon wedding photographers—helps you adapt to any scene, while high-quality memory cards make sure every image is safely stored. And when you invest in wedding photography gear you can trust, you’re not just capturing moments—you’re building a career where every frame tells a story worth remembering.
Table of Contents
- Unlocking Perfect Wedding Photos: Baseline Camera Settings
- Grasping the Photography Fundamentals
- Shooting Modes: Balancing Control and Convenience
- Adapting to Lighting Conditions at Weddings
- Image Quality Settings: Shooting RAW vs JPEG
- Cheat Sheet: Quick Reference for Different Wedding Scenarios
- Conclusion: Capturing Memories with Confidence
Unlocking Perfect Wedding Photos: Baseline Camera Settings
Why Camera Settings Matter in Wedding Photography
Shooting a wedding isn’t just about knowing your gear; it’s about being ready for anything. The day moves fast, shifting from bright outdoor ceremonies to dimly lit receptions, each requiring a different approach to exposure, shutter speed, and white balance. The right settings can mean the difference between crisp, vibrant images that feel alive and flat, underexposed shots that don’t do the moment justice.
Indoor weddings come with low-light challenges, while outdoor ceremonies demand careful handling of harsh sunlight and shifting conditions. Over the years, We’ve refined a go-to set of wedding photography settings that help me adjust quickly, allowing us to focus on what really matters—capturing the emotion, connection, and fleeting moments that make each wedding unique. When you truly understand your camera, you can stop second-guessing and start shooting with confidence, knowing you won’t miss a thing.
Grasping the Photography Fundamentals
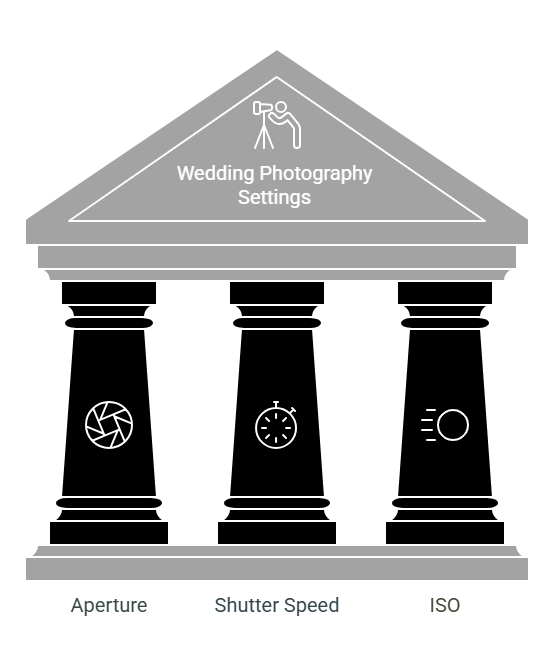
When getting started with wedding photography, three key settings—aperture, shutter speed, and ISO—make all the difference. Mastering how they work together is the foundation for capturing timeless images that truly reflect the emotion and energy of the day.
Understanding Aperture: Creating Depth and Focus
Aperture is your lens’s gateway to light and creativity. Think of it like your camera’s pupil—the wider it opens (lower f-number), the more light it lets in, and the softer the background becomes. In wedding photography, dialing in the right aperture is key. A wide aperture creates those dreamy, romantic portraits, while a narrower one keeps group shots sharp and in focus.
Mastering Shutter Speed: Freezing the Moment
Shutter speed is what controls time in your photos. It decides whether you freeze a moment in crisp detail or capture the soft motion of a first dance. Getting it right is key to preserving the quick glances, laughter, and fleeting emotions that make weddings so unforgettable.
ISO Basics: Capturing Light Effectively
ISO controls your camera’s sensitivity to light, and knowing when to adjust it can make all the difference in your wedding photos. In dark reception venues, it’s tempting to crank it up, but balancing light and image quality is key to avoiding unnecessary grain while keeping your shots bright and clear.
Shooting Modes: Balancing Control and Convenience
Choosing the right camera mode for wedding photography can feel like a big decision, but understanding how each one works makes all the difference. Weddings move fast, and being comfortable with your settings means you can focus on capturing the emotions, details, and moments that make the day special. Here are three camera modes most wedding photographers use most often and the best situations for each one.
Aperture Priority Mode: The Ideal Balance
Aperture Priority (A or Av) mode can be a useful choice in many wedding scenarios, especially for those who want control over depth of field while allowing the camera to handle shutter speed. This setting is often favored for portraits and ceremony shots where achieving a consistent background blur enhances the overall aesthetic.
Some wedding photographers pair Aperture Priority Mode with Auto ISO as a way to adapt to changing lighting conditions without constantly adjusting settings. By setting a maximum ISO—often around 3200—and a minimum shutter speed of 1/125th of a second, they aim to maintain sharp, well-exposed images while letting the camera handle the rest.
Shutter Priority Mode: Perfect for Movement
For photographers who prioritize capturing movement, Shutter Priority (S or Tv) mode can be an option. This mode is often used for fast-paced moments like first dances, bouquet tosses, or high-energy reception scenes. By setting a specific shutter speed, photographers can choose whether to freeze motion or introduce intentional blur, while the camera adjusts the aperture as needed.
For quick action, a shutter speed of 1/500th of a second or faster helps prevent motion blur. On the other hand, for slower dances or artistic effects—such as a soft blur in the bride’s dress while keeping faces sharp—some may lower the shutter speed to around 1/60th of a second.
Manual Mode: Taking Full Control
While it might seem intimidating at first, Manual mode is invaluable in tricky lighting situations. We use it the whole wedding day but some tend to rely on it the most during ceremonies with mixed lighting or when working with flash during the reception. This mode gives a photographer complete control over the exposure triangle – aperture, shutter speed, and ISO.
Manual mode becomes especially crucial in scenarios where consistency is key, such as shooting formal group portraits or when working in venues with challenging lighting conditions. It prevents the camera from making unwanted exposure adjustments that could result in inconsistent images within a series.
Every shooting mode has its strengths, and different photographers choose what works best for their style. The key is understanding how each mode functions and knowing when it makes sense to use it based on the lighting and the moment being captured.
Adapting to Lighting Conditions at Weddings
Mastering various lighting conditions is key to creating consistently beautiful wedding photos. Each part of the day brings its own challenges, from the soft glow of golden hour to the unpredictable mix of indoor lighting. Here’s how different scenarios can be handled effectively to capture every moment at its best.
Indoor Lighting: Settings for Dimly Lit Venues
Shooting indoors comes with its own set of lighting challenges, especially in dimly lit churches or reception halls. To keep images sharp and well-exposed, we usually start with these settings:
- Aperture: f/2.8 or wider to maximize light intake
- ISO: 1600-3200 (depending on your camera’s capabilities)
- Shutter Speed: No slower than 1/100th second to maintain sharpness
Remember to spot meter for the couple’s faces in darker venues, as the camera’s matrix metering might be fooled by dramatic lighting differences.
Outdoor Lighting: Optimal Settings for Natural Light
For outdoor weddings, the challenge is balancing bright natural light while keeping details in both highlights and shadows. We typically start with a low ISO of 100 or 200 to maintain the highest image quality. From there, we adjust settings to match the conditions and ensure every shot looks its best.
- Aperture: f/4 to f/8 for group shots
- ISO: 100-200 for clean, noise-free images
- Shutter Speed: 1/250th or faster to combat bright conditions
Golden Hour Advantages and Techniques
The golden hour provides some of the most beautiful, flattering light for wedding photography. During this time, we typically use these settings:
- Aperture: f/2.8 or wider for dreamy portraits
- ISO: 400 or lower to capture the warm tones accurately
- Shutter Speed: 1/200th second to balance the fading light
Position your couples with the sun behind them to create beautiful rim lighting and soft, glowing skin tones.
Flash Usage: Enhancing and Not Overpowering
Flash should complement natural light, not dominate it. We typically use flash in these ways:
- During daytime: Set flash to -1 or -2 stops for subtle fill light
- For receptions: Bounce flash off walls or ceilings when possible
- For outdoor portraits: Use flash at 1/4 power as fill light to soften shadows
The key is maintaining a natural look by balancing flash with ambient light. Start with lower power settings and adjust gradually until you achieve the desired effect.
These settings are just a starting point—you’ll need to adjust them based on the lighting and atmosphere of each moment. The goal is to preserve the natural feel of the venue while ensuring well-exposed, sharp images that truly capture the emotion and details of the day.
Image Quality Settings: Shooting RAW vs JPEG
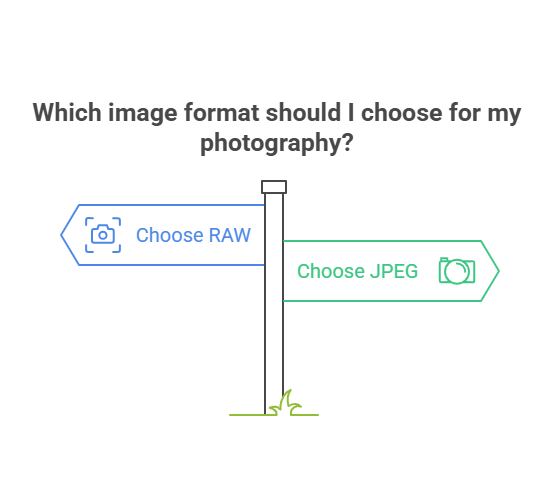
One of the most crucial decisions you’ll make for wedding photography is choosing between RAW and JPEG formats. This choice affects not only your workflow but also the final quality of your delivered images. Let me break down both options to help you make an informed decision.
Benefits of Shooting in RAW for Post-Editing
Most professionals shoot in RAW because it retains more detail and offers greater flexibility in post-processing.
- Greater exposure latitude: Recover up to 2–3 stops of highlights and shadows—especially useful for tricky lighting, like a bright wedding dress against a dark church interior.
- Complete white balance control: Adjust color temperature in post without losing image quality.
- Higher bit depth: RAW files capture more color detail, resulting in smoother tonal transitions and more flexibility in editing.
- Non-destructive editing: No matter how many adjustments you make, the original image data stays intact.
Situations to Opt for JPEG
While RAW is my go-to format, there are specific scenarios where JPEG makes sense:
- Second shooter scenarios where quick turnaround is priority
- When storage space is limited and you’re confident in your exposure
- High-volume situations like photo booths at receptions
- When clients need immediate previews during the event
If you’re unsure, RAW+JPEG is always an option. It does take up more card space, but having that extra editing flexibility for once-in-a-lifetime moments is often worth it.
Cheat Sheet: Quick Reference for Different Wedding Scenarios
We’ve refined our wedding photography camera settings over years of experience, and having a go-to cheat sheet makes all the difference on a fast-paced wedding day. Here’s a breakdown of the key scenarios you’ll encounter and the settings we rely on to adapt quickly as lighting and moments change.
Ceremony Settings
For ceremonies, we’ve found that an aperture of f/2.8 to f/4.0, a shutter speed of at least 1/200 sec, and an ISO between 400-1600 (depending on the lighting) work well for capturing sharp, well-exposed images. Here’s our detailed breakdown:
Indoor Ceremony:
- Aperture: f/2.8
- Shutter Speed: 1/200th sec minimum
- ISO: 800-1600
- Mode: Manual
Outdoor Ceremony:
- Aperture: f/4.0
- Shutter Speed: 1/250th sec
- ISO: 100-400
- Mode: Manual
Reception Settings
Reception venues often present challenging lighting conditions. Here’s how we handle them:
Dancing/Action Shots:
- Aperture: f/2.8
- Shutter Speed: 1/200th sec minimum
- ISO: 1600-3200
- Flash: Bounce at 1/8 power
- Mode: Manual
Bridal Portraits and Group Photos
Individual Portraits:
- Aperture: f/1.8-f/2.8
- Shutter Speed: 1/200th sec
- ISO: Lowest possible (100-400)
- Mode: Manual
- Focus: Single point AF
Group Photos:
- Aperture: f/8
- Shutter Speed: 1/125th sec minimum
- ISO: 400-800
- Mode: Manual
- Focus: Zone AF
Pro Tip: Keep this cheat sheet handy during your first few weddings. With time and practice, these settings will become second nature, letting you focus on composition and capturing real, emotional moments instead of worrying about technical adjustments.
Conclusion: Capturing Memories with Confidence
Wedding photography is more than just mastering settings—it’s about telling a story, capturing emotions, and preserving fleeting moments that will be cherished for generations. While technical skills are essential, the heart of great photography lies in your ability to see and feel the moment before it even happens.
The best wedding photographers aren’t just experts in camera settings; they’re patient observers, quick thinkers, and problem-solvers. They know that no two weddings are the same, and they embrace the unpredictability of the day with confidence and creativity.
So, as you refine your skills, remember this: stay prepared, but also stay present. Anticipate the moments before they unfold, trust your instincts, and let your passion for storytelling shine through.

-12")


