-8")


Indoor wedding photography isn’t about simply working around tricky conditions—it’s about embracing what makes these spaces special! From the soft glow of candlelit receptions to the intimate energy of a bride getting ready in a cozy hotel suite, indoor settings offer a depth and richness that outdoor locations can’t always match.
Over the years, we’ve learned that the secret to capturing incredible indoor wedding photos comes down to preparation and adaptability. Instead of battling the space, the best results come from working with what’s already there—using available light to your advantage and supplementing it when needed! Having the right gear can make all the difference, whether it’s a fast prime lens or an external flash—check out our must-have wedding photography gear to build a setup that works in any environment.
And if you’re only starting out, don’t worry! Learning how to navigate different lighting scenarios is a skill that develops over time. If you’re still in the early stages of your photography journey, this guide on becoming a wedding photographer is packed with insights to help you get started. Beyond the technical side, running a smooth and professional business matters too—whether it’s optimizing your SEO to attract the right clients or choosing the best client management system (here’s a breakdown of Dubsado vs. HoneyBook). With the right mix of preparation, gear, and mindset, you’ll be ready to tackle any indoor wedding with confidence!
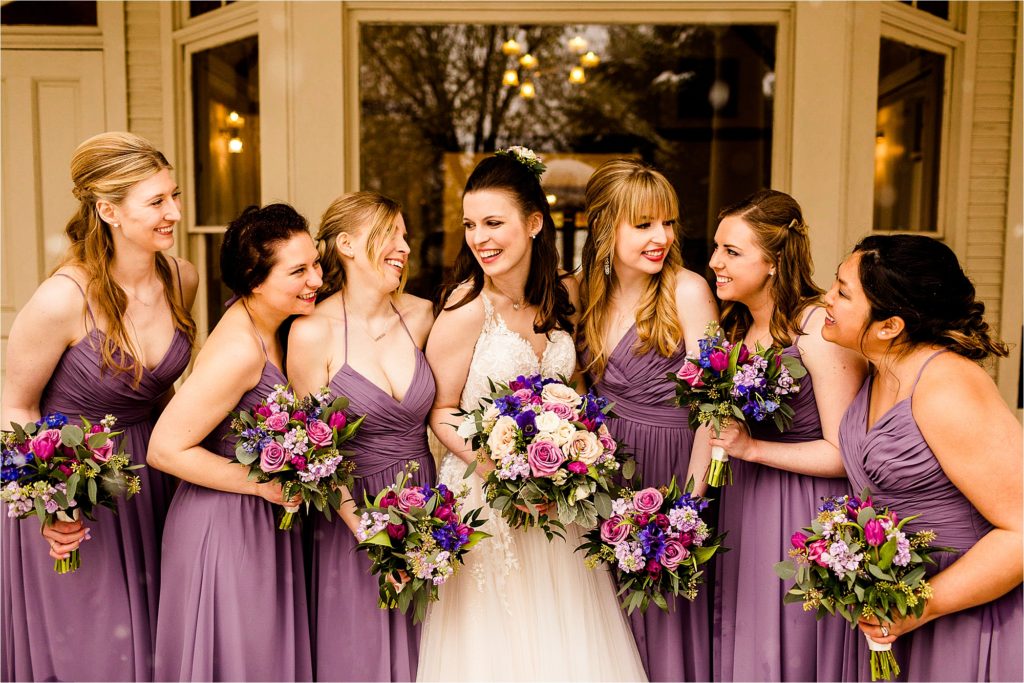
Table of Contents
Understanding Indoor Lighting Dynamics
Nailing indoor wedding photography starts with one important skill: knowing how light behaves in enclosed spaces. Unlike outdoor shoots, where harsh sunlight is the challenge, indoor venues bring their own mix of obstacles and opportunities that shape the mood of your images!
The Importance of Ambient Light
Ambient light is the heart of indoor wedding photography. It’s what sets the tone of a venue—whether it’s the warm glow of chandeliers, soft candlelight flickering across tables, or moody uplighting on the dance floor. This existing light is a huge part of why couples fall in love with their venue, so capturing it authentically makes your images feel true to the day.
Before taking a single shot, I always take a moment to observe how light interacts with the space. Is it romantic and dim or bright and airy? Are there unique shadows or patterns worth incorporating? One of the best lessons I’ve learned is to expose slightly for the ambient light rather than overpowering it with flash. This keeps the venue’s natural charm intact while still ensuring the couple is beautifully lit!
If you’re figuring out the best camera settings for indoor photography without flash, push your camera’s low-light capabilities! Today’s sensors handle high ISOs better than ever, so don’t hesitate to bump up your indoor ISO setting to 1600, 3200, or even higher if your camera manages noise well. Pairing that with a wide aperture lens (f/1.8 or f/1.4) will help you make the most of the available light!
Strategies for Using Natural Window Light
When it comes to indoor wedding photography, windows are pure gold! Their directional light adds dimension, enhances natural skin tones, and creates depth that artificial lighting can’t always replicate.
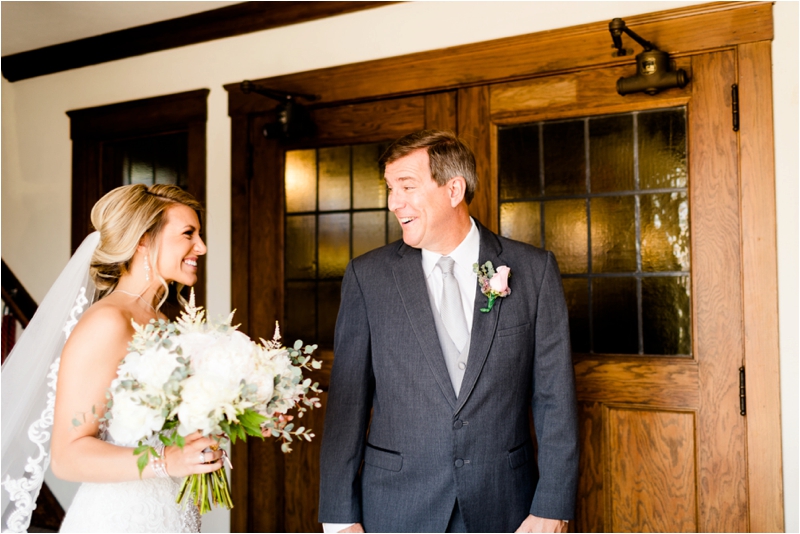
For getting-ready photos, placing the bride or groom near a window is a simple yet powerful move. A trick I use when photographing white wedding dresses is slightly underexposing to preserve detail in the fabric. This way, highlights stay intact, and texture can be brought out in post-processing.
A great approach is positioning your subject perpendicular to the window for dramatic side lighting that sculpts facial features beautifully! If you’re after softer, more even light, have them face the window—this fills in shadows and creates a flattering, natural glow. Keep in mind that window light shifts throughout the day, so staying flexible is key!
Handling Mixed Lighting Conditions
Mixed lighting is one of the biggest challenges in indoor wedding photography. When daylight streams through windows while tungsten chandeliers glow overhead—and maybe even some colorful LED uplighting is thrown into the mix—getting accurate white balance can be tricky!
Instead of fighting mixed lighting, the trick is choosing one dominant light source to balance for. If window light is your main source, set your white balance for daylight, then manage artificial lights by adjusting your positioning or using gels on your flash to match color temperatures. Shooting in RAW also gives you more flexibility to fine-tune white balance later!
One technique I swear by is treating ambient light as a creative backdrop while using flash to light the couple. A great starting point is using settings like f/1.8, 1/200th, ISO 800, and flash at 1/16th power—this creates a balance that preserves the venue’s atmosphere while keeping the couple properly exposed. From there, tweak your settings based on the scene!
And here’s the thing—mixed lighting doesn’t always need to be “fixed.” Sometimes, the contrast between warm and cool tones adds character to a shot, creating a dynamic, visually interesting look! The key is making intentional choices rather than letting the lighting dictate the outcome.
Camera Settings for Indoor Weddings
Optimal Camera Settings for Low-Light Environments
Indoor wedding venues often come with limited light, meaning your camera settings need to work overtime to capture crisp, beautifully lit images! Whether you’re shooting in a softly lit chapel, a moody reception hall, or a cozy getting-ready suite, dialing in the right exposure is key.
For low-light situations, start with these foundation settings:
Aperture: Your best tool in low light! Shooting with a wide aperture (f/1.4 to f/2.8) allows more light to hit the sensor, keeping your images bright while creating that dreamy, blurred background that makes your subjects pop. Prime lenses are ideal here, as they offer lower f-stops and better light-gathering power! (Check out our post on aperture priority mode!)
For shutter speed, aim to stay above 1/100s whenever possible to avoid motion blur, especially during active instances like the first dance. Keeping your shutter speed high for action shots prevents blur during dynamic instants like makeup application or dress preparations.
ISO: Don’t be afraid to raise your ISO! Modern cameras handle noise incredibly well, so bumping up to ISO 1600, 3200, or even 6400 can give you cleaner images than underexposing and trying to recover details later.
Shooting in RAW for Enhanced Post-Processing
If there’s one non-negotiable tip for indoor wedding photography, it’s this: always shoot in RAW. Unlike JPEG, which compresses your image, RAW files retain every bit of detail captured by your sensor, giving you complete flexibility in post-processing!
RAW files offer three major advantages in tricky indoor lighting:
- White Balance Flexibility: Indoor venues often have a mix of warm tungsten, cool LED, and natural window light—all competing in the same frame! RAW allows you to fine-tune your white balance without reducing image quality.
- Exposure Recovery: Slight underexposure helps preserve details in bright whites—especially in wedding dresses! RAW files let you recover shadows and highlights smoothly, keeping textures intact.
- Noise Reduction Control: Higher ISOs can introduce grain, but with RAW, you can apply noise reduction without sacrificing sharpness. This is a game-changer when you’re shooting in darker venues where flash isn’t allowed!
Indoor weddings may push your technical skills, but with the right camera settings and a strong post-processing workflow, you’ll capture images that truly reflect the warmth and beauty of the day!
Adjusting ISO for Best Results
ISO is one of the most powerful tools in indoor wedding photography! Modern cameras handle high ISO levels better than ever, but knowing your specific camera’s limits is key to striking the perfect balance between brightness and image quality.
As a starting point, you can begin with ISO 800 for reception photography when using flash. When shooting without flash, your indoor ISO setting without flash will likely need to be much higher—potentially 1600, 3200, or even 6400 depending on the venue’s lighting.
Rather than fearing high ISO, embrace what your camera can handle! Many professional cameras produce clean, usable images at ISO 6400 or beyond. And here’s the truth—a slightly grainy but well-composed shot that captures a meaningful interaction will always be more valuable than a technically perfect image of nothing at all. Motion blur and underexposure are far more noticeable than a bit of noise!
To determine your ISO ceiling, test your camera before the wedding day. Take sample shots at different ISO levels in lighting similar to your venue, then examine them at 100% magnification to see how much noise your camera produces at each setting. This simple test make sure that when critical instants unfold, you’ll already know how far you can push your settings with confidence!
Don’t forget, ISO, aperture, and shutter speed work together in a balancing act. When you adjust one, you’ll likely need to tweak the others to maintain proper exposure while staying true to your creative vision. Learning this interplay is what elevates good indoor wedding photography into something truly remarkable!
Flash Techniques for Indoor Venues
When natural light isn’t enough, flash becomes your best tool for creating beautifully lit images! But there’s a big difference between using flash as a blunt instrument and using it as an artistic light source that enhances the venue’s ambiance while keeping your subjects looking natural. Break down how to get the best results from flash in indoor wedding settings!
Choosing the Right Flash Equipment
A strong flash setup is important for wedding photography! Since receptions, ceremonies, and prep spaces often have unpredictable lighting, your gear needs to be versatile and reliable—not overly complicated.
External speed lights are the workhorses of wedding photography. I recommend having at least two external flashes per primary camera—one as your main flash and one as backup. This redundancy has saved countless wedding photographers from disaster when equipment fails in critical instances. Reliability always trumps complexity when it comes to flash setups.
For reception coverage, consider a dual photographer approach with complementary flash setups. One photographer can establish a fixed position with a 70-200mm lens and flash on a tripod, while the second moves freely with an on-camera flash and wider lens. This strategy provides great coverage without missing key instants.
When selecting triggers for off-camera flash, prioritize reliability over advanced features. Radio triggers typically offer better range and don’t require line-of-sight, making them ideal for larger venues where you might place flashes in corners or behind decorative elements.
How to Effectively Bounce and Diffuse Flash
Direct flash is harsh, flattening details and creating unflattering shadows—not exactly ideal for wedding photography! Instead, bouncing and diffusing your flash transforms artificial light into soft, natural-looking illumination that enhances your subjects.
- Bounce Flash Off Neutral Surfaces: White or light-colored ceilings and walls are perfect for bouncing flash. Instead of pointing your flash straight up (which can cause shadows under the eyes), aim it at an angle behind you. This creates directional, flattering light!
- Handling Dark or High Ceilings: If the ceiling is too high or dark to bounce light effectively, portable bounce cards or collapsible reflectors can save the day! These let you redirect flash even when the venue’s architecture isn’t working in your favor.
- Using Flash Diffusers: When bouncing isn’t an option, diffusers become important! From simple plastic diffusers that attach to your speedlight to larger soft boxes and beauty dishes for off-camera setups, the right modifier can make all the difference. Even a DIY white card reflector attached to your flash with a rubber band can significantly improve light quality in a pinch!
A well-lit image doesn’t mean an over-lit image! The goal is to preserve the venue’s atmosphere while keeping your couple and their guests looking incredible.
Using Gelled Flashes for Creative Effects
Gelled flashes are one of the most versatile tools in indoor wedding photography! Not only do they help balance color temperature for natural-looking images, but they also open the door to great creative effects that add energy and depth to your shots.
From a technical standpoint, gels allow your flash to blend seamlessly with ambient lighting. For example, in venues with warm tungsten lights, using CTO (Color Temperature Orange) gels on your flash make sure that subjects don’t appear unnaturally cool against the golden background. Without this adjustment, your couple might look oddly out of place in an otherwise warm, romantic setting!
But gels aren’t only for color correction—they also offer creative opportunities! Some of my most striking reception shots have come from experimenting with colored gels on rim lights during the dance floor action. Try placing a gelled flash behind the couple or guests to create dramatic silhouettes and vibrant light flares that amplify the party atmosphere!
When using gels creatively, subtlety is key. The goal is to enhance the mood, not overwhelm the image. Start with lighter gel densities and gradually increase intensity as you refine your technique. Small adjustments can make a big difference in achieving natural yet eye-catching effects!
Understanding Second Curtain Sync
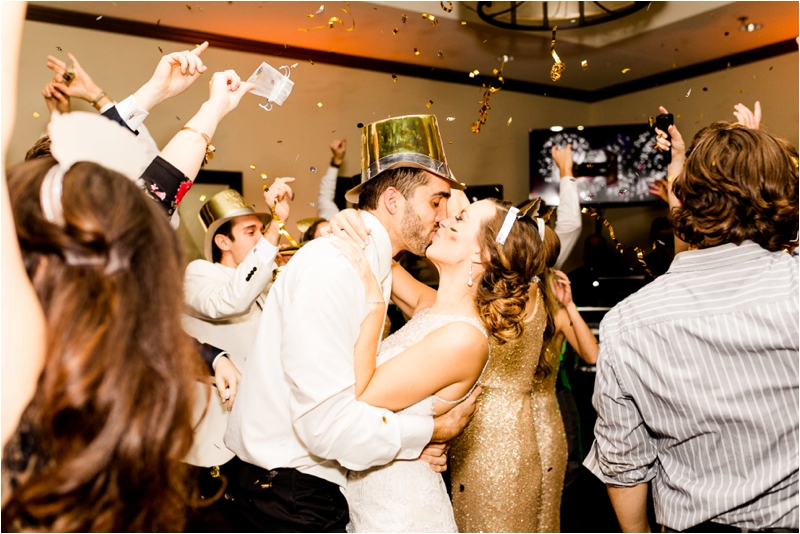
Second curtain sync (also known as rear curtain sync) is a game-changer for reception photography! This flash technique fires the flash at the end of the exposure rather than the beginning, creating motion trails that appear behind your subject—resulting in a natural, dynamic look.
With standard (first curtain) sync, the flash fires at the start of the exposure, which can make motion trails look unnatural, as if they’re leading the subject instead of following them. But with second curtain sync, motion is captured first, and the final flash burst freezes your subject at the end, keeping movement smooth and realistic!
One really cool technique when shooting wedding receptions is combining second curtain sync with a slower shutter speed (around 1/15 to 1/30 of a second) for first dances. This technique, often called “dragging the shutter,” allows you to capture both the crisp details of the couple (thanks to the flash) and the graceful motion of their dance (recorded by the ambient light).
Start with our proven flash settings —f/1.8, 1/200th, ISO 800, and flash power at 1/16th— that provide a solid foundation. From there, you can adjust to incorporate second curtain sync and slower shutter speeds as appropriate for the specific moment and creative vision.
And don’t forget—if you’re working alongside a videographer, communication is so important. Sudden bursts of flash can disrupt video footage, so collaborating on lighting setups ensures a smooth experience for everyone involved. Thoughtful teamwork not only improves your results but also strengthens your reputation in the industry!
Composition and Creativity
Playing with Composition: Tips and Tricks
Composition is the silent language of photography, guiding the viewer’s eye and evoking emotion in every frame. While exposure settings are important, understanding composition transforms a simple photo into a work of art.
Rule of Thirds: This is a classic for a reason! Instead of centering your subject, position them along the intersections of imaginary grid lines dividing your frame into thirds. This creates balance and movement, drawing the viewer into the scene. For example, during the first dance, placing the couple along the left or right third of the frame adds more visual interest than keeping them dead center!
Leading Lines: Indoor venues are full of natural leading lines—hallways, aisles, staircases, and rows of chairs all help guide the viewer’s eye toward your subject. When setting up a shot, look for elements that naturally pull attention to the couple. Diagonal lines, in particular, add energy and depth to the composition!
Layering for Depth: Indoor settings can sometimes feel flat, but layering foreground, midground, and background elements instantly adds dimension. Try framing the couple through soft-focus guests, floral arrangements, or architectural details to create a rich, immersive perspective.
Negative Space for Impact: Sometimes, less is more! While it’s tempting to fill every inch of the frame, leaving intentional negative space around your subject can heighten emotion and create an intimate, cinematic feel. This works beautifully for quiet instants, like a stolen glance between the couple or a single figure illuminated by dramatic lighting.
Don’t forget the power of negative space in telling stories. While it might seem counterintuitive in information about wedding photography guides that typically suggest filling the frame, sometimes allowing empty space around your subject creates impact and draws attention to intimate instances.
Embracing Venue Architecture for Unique Shots
Indoor wedding venues offer far more than only shelter from the elements—they provide great architectural elements that can transform ordinary portraits into unforgettable images! From sweeping staircases to intricate moldings, these details add elegance, depth, and a sense of place that outdoor settings simply can’t replicate.
When stepping into a venue, take a moment to observe its unique architectural features. Look for symmetry in columns, archways, or light fixtures—these elements naturally draw the eye and can be used to create perfectly balanced compositions. Positioning the couple at the center of symmetrical structures adds a sense of grandeur and importance to the image!
Some of the best natural frames in indoor wedding photography come from doorways and windows. Placing the couple within these structures creates a frame-within-a-frame effect, leading the viewer’s eye straight to them. Additionally, the contrast between light and dark areas around a window creates a natural vignette, focusing attention exactly where you want it!
For a fresh perspective, change your shooting angle! Get low to make staircases and vaulted ceilings look even more dramatic, or shoot from above to showcase intricate floor patterns and the overall ambiance of the venue. These perspective shifts add variety to your wedding album and highlight details that guests may not notice during the event.
And don’t forget reflective surfaces! Mirrors, polished floors, and even decorative metalwork can create great reflections that add layers to your composition. Try capturing the couple’s reflection in an ornate mirror or the glossy ballroom floor—it’s a simple trick that delivers outstanding results!
Incorporating Silhouettes for Dramatic Imagery
Silhouettes are one of the most powerful yet underused techniques in wedding photography! When executed well, they create striking, high-impact images that stand out in any wedding album.
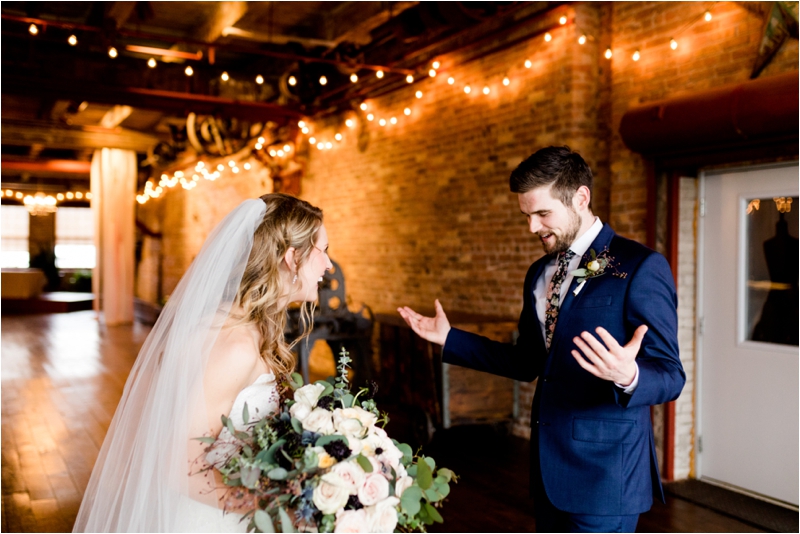
The secret to a great silhouette is strong backlighting. Windows are your best friend here—position the couple in front of a bright window and expose for the highlights outside. The result? A beautifully defined outline that emphasizes their shape and movement while allowing the details of their attire and expressions to fade into shadow. This is especially effective for first looks or quiet instants between the ceremony and reception!
For added creativity, incorporate architectural elements into the silhouette. Placing the couple inside an archway or doorway creates a visually compelling outline, adding extra depth and context to the image. Instead of a plain background, the venue itself becomes part of the story!
And silhouettes don’t always have to be full-body shots! Close-up silhouettes of hands exchanging rings, foreheads nearly touching, or a couple’s profiles about to kiss can feel even more intimate and artistic. Sometimes, what you leave to the imagination is more powerful than what you reveal!
Even when shooting silhouettes, the composition is vital. Make sure the outlines are instantly recognizable and thoughtfully positioned in the frame. Negative space plays a huge role here—use it to create balance and enhance the impact of the silhouette rather than letting it feel empty or distracting.
At the end of the day, indoor photography isn’t about rigid rules—it’s about understanding when to follow compositional principles and when to break them for more impactful storytelling. The best wedding images come from a combination of skill, intuition, and a willingness to experiment!
Lens Selection and Equipment Considerations
The right lens can make or break your indoor wedding photography! Since lighting conditions indoors can be unpredictable, having the right gear make sure you can capture crisp, well-exposed images without relying too heavily on artificial light. Break down the best lens choices for indoor wedding success!
Choosing the Right Lens for Indoor Photography
Your lens choice dramatically impacts your ability to shoot in low-light environments. When building your wedding photography kit, focus on versatility and light-gathering ability!
- Prime Lenses: These are must-haves for indoor wedding photography! Their wide apertures (f/1.4–f/2.0) allow more light into the camera, making them ideal for dimly lit ceremonies and receptions. The three best primes to have in your kit:
- 35mm f/1.4 – Perfect for wide environmental shots and tight spaces.
- 50mm f/1.4 – A fantastic all-purpose lens with a natural perspective.
- 85mm f/1.2 – Ideal for portraits and ceremony shots from a distance.
- Zoom Lenses: If you prefer zoom flexibility, invest in professional-grade lenses with a constant f/2.8 aperture.
- 24-70mm f/2.8 – A workhorse lens for covering various focal lengths without sacrificing image quality.
- 70-200mm f/2.8 – Necessary for ceremonies, allowing you to capture intimate instants from a respectful distance.
Autofocus Matters!
Indoor lighting can be challenging for autofocus, so investing in lenses with fast, accurate autofocus motors will save you frustration. Newer lens models tend to perform better in low-light conditions, making them a smart investment for wedding photographers!
Advantages of Fast Lenses in Low-Light Settings
A fast lens (one with a wide maximum aperture like f/2.8 or wider) is one of the best investments you can make for indoor wedding photography. These lenses offer three major advantages:
- Superior Light Gathering
- A wider aperture lets in significantly more light, reducing the need for high ISO settings and flash. This is critical in dimly lit churches, reception venues, and hotel rooms!
- The difference between an f/1.4 lens and an f/4 lens is huge—an f/1.4 lens lets in eight times more light! That can be the difference between a sharp, well-exposed image and a blurry, noisy shot.
- Dreamy Background Blur (Bokeh)
- A wide aperture creates a shallow depth of field, allowing you to isolate your subject beautifully! This is perfect for portraits, getting-ready shots, and romantic couple instants where you want to blur out distractions in the background.
- Cleaner Images with Lower ISO
- Using a wider aperture allows you to shoot at lower ISO settings, which means less digital noise and sharper images. While modern cameras handle high ISO well, keeping it as low as possible still results in cleaner, more professional-looking photos.
And here’s a lesser-known tip—fast lenses don’t only perform better in low light; they also tend to have better contrast and color rendition, even when stopped down. That means your images will have richer tones and crisper details, making them look even more polished straight out of the camera!
Additional Tools: Tripods, Reflectors, and More
While cameras and lenses often steal the spotlight, the right accessories can make a world of difference in indoor wedding photography! A carefully chosen set of tools complements your main gear and gives you creative flexibility when dealing with tricky lighting conditions.
Reflectors are one of the most affordable and effective ways to enhance indoor lighting without relying on flash. A collapsible 5-in-1 reflector can bounce natural window light to soften shadows, create beautiful catchlights in the eyes, or even act as a quick backdrop! When used correctly, a white or silver reflector can boost available light by 1–2 stops, making a huge difference in challenging indoor settings.
Battery management is another key consideration for indoor wedding photography! Shooting at higher ISO settings and using longer exposures can drain your batteries much faster than outdoor work. To stay ahead of the game, carry at least three fully charged batteries per camera body and rotate them throughout the day so you’re never left scrambling for power at a critical time.
Memory cards deserve as much attention! Fast write speeds are especially important in low light since larger RAW files take longer to process. We always recommend bringing plenty of extra memory cards—one of the simplest and most affordable ways to safeguard your work on a wedding day.
And don’t overlook the importance of a solid camera strap or harness system! Dual-camera setups are a go-to for indoor weddings, letting you switch between focal lengths on the fly without missing a beat. A comfortable harness system evenly distributes weight across your shoulders and back, helping to prevent fatigue while keeping both cameras within reach at all times.
Preparing for the Big Day

Pre-Wedding Planning and Tips
Solid pre-wedding planning can mean the difference between a smooth, stress-free day and complete chaos! Start by having an open conversation with the couple about their expectations, especially when it comes to indoor shots. Many couples bring inspiration from Pinterest, unaware that those dreamy images often require specific lighting setups or venue conditions. Setting realistic expectations upfront make sure everyone is on the same page.
Build a detailed timeline that accounts for the extra time indoor photography requires. Unlike outdoor shoots, indoor settings often need additional setup for lighting adjustments, so buffer your schedule accordingly! A well-structured plan should include extra time for transitioning between locations and tweaking your gear to match different lighting conditions.
One of the most overlooked wedding photography tips for beginners? A rock-solid equipment checklist! For indoor weddings, your gear should include:
- Primary and backup camera bodies
- Fast lenses (f/2.8 or wider for better low-light performance)
- Multiple flash units and triggers
- Extra batteries (for both your camera and flashes)
- Plenty of memory cards
- Lens cleaning supplies
- Battery chargers
- Light modifiers (such as diffusers and bounce cards)
The best way to prepare for technical challenges? Practice! Set up test shoots in low-light environments similar to the wedding venue. This hands-on experience helps build muscle memory for quick camera adjustments and lets you troubleshoot potential issues before the big day.
And as we always emphasize—have a backup plan for everything! Equipment failures tend to happen at the worst times, so redundancy is where it is at. Our go-to advice? Always carry at least two external flashes per primary camera body. This simple precaution has saved more wedding shoots than you can imagine. Their advice to have at least two external flashes per primary camera has saved countless wedding shoots from disaster.
Scouting the Venue and Planning Your Shots
No wedding photography guide is complete without stressing the value of venue scouting! Whenever possible, visit the venue at the same time of day as the wedding. This gives you an accurate read on the lighting conditions and helps you spot both challenges and creative opportunities specific to the space.
During your visit, pay close attention to:
- Natural light sources (windows, skylights)
- Wall colors for flash bouncing (white walls work best!)
- Ceiling height (affects how flash diffuses)
- Architectural features for framing and composition
- Background distractions that could take away from your shots
- Power outlet locations for lighting setups
- Any venue restrictions on flash or equipment placement
Take a few test shots while you’re there and review them later on a larger screen. You might catch exposure inconsistencies, tricky white balance issues, or shadow problems that aren’t as obvious on your camera’s LCD. This gives you a chance to fine-tune your approach before the pressure of the wedding day kicks in!
Create a shot list tailored to the venue’s indoor spaces. Identify where natural light works best for portraits, which architectural features add interest to compositions, and where you might need extra lighting support. Share this plan with any second shooters or assistants so your whole team is on the same page!
Adapting to Last-Minute Changes
No matter how well you plan, weddings always throw surprises your way! The best photographers don’t only anticipate potential problems—they come prepared with backup solutions so they can adapt seamlessly.
Weather shifts can suddenly move an outdoor ceremony indoors, completely changing your lighting setup. Always scout indoor alternatives for every planned outdoor shot! Identify spaces with the best natural light and have a plan for modifying your approach if the wedding day forecast takes an unexpected turn.
Equipment malfunctions are another common challenge. We always recommend packing extra batteries, memory cards, and backup flashes—and for good reason! If something fails at a critical moment, having a backup on hand keeps you shooting without missing a beat.
Timeline delays happen at almost every wedding. Be ready to pivot by keeping a priority list of must-have shots. When time gets tight, knowing which images are important versus nice-to-have helps you make quick decisions without sacrificing quality.
Lighting conditions can change unexpectedly. Maybe the bright natural light you scouted is now dimmed by an overcast sky, or perhaps the venue has switched up their ambient lighting. The key is flexibility! Know when to embrace available light, when to introduce fill flash, and when to go fully flash-powered to maintain consistency in your images.
Beyond technical skills, how you handle last-minute changes matters as much. Stay calm, confident, and adaptable. If you look stressed, the couple will pick up on it. But if you roll with the changes smoothly, they’ll trust that their photos are in good hands!
Conclusion
Indoor wedding photography is a blend of technical expertise, creative intuition, quick decision-making, and strong communication skills. By learning these elements and approaching each wedding with thoughtful preparation and flexibility, you’ll create images that not only document a couple’s special day but also preserve the energy and emotion that made it meaningful. And in doing so, you’ll experience the incredible satisfaction of creating art that becomes a treasured part of your client’s lives for generations to come!

-12")


