-8")


Have you ever noticed how some engagement photos possess a wonderfully romantic quality while others seem to miss that spark? The explanation might be wonderfully straightforward! Natural light—that amazing, freely available resource for every photographer—often marks the distinction between standard engagement photos and truly captivating ones. Learning to work with natural light develops beyond a technical capability into an approach that can elevate your engagement photography and truly delight your clients!
Understanding how to harness natural light begins long before you even pick up your camera—it starts with preparation, intentional direction, and the right tools. Whether you’re selecting gear that performs beautifully outdoors (check out our go-to engagement photography equipment) or guiding your couples with confidence using these advanced engagement posing techniques, every choice you make helps bring out that natural glow. And if you’re hoping to attract more couples who love that romantic, light-filled look, these SEO tips for wedding photographers can help you get found by the right clients. Want to keep your calendar full? Our post on how to get wedding photography clients walks you through building connections that last—because great lighting means nothing without great people in front of your lens!
Table of Contents
- Harnessing Natural Light: Proven Skills and Techniques for Professional Engagement Photographers
- Key Natural Light Skills for Beautiful Engagement Photography
- Overcoming Challenges with Natural Light Photography
- Advanced Techniques for Controlling Natural Light
- Troubleshooting Common Natural Light Problems
- Practical Tips for Preparing and Planning Your Shoot
- Capturing Emotions and Moments with Natural Light
- Building Your Portfolio: Leveraging Natural Light Photography
- Conclusion: Embracing the Art and Science of Natural Light in Engagement Photography
Harnessing Natural Light: Proven Skills and Techniques for Professional Engagement Photographers
Natural light serves as a photographer’s greatest collaborator, particularly when documenting the connection between engaged couples. According to recent industry research, a significant 57% of photographers favor using natural light for engagement shoots, especially during the golden hour. This choice reflects more than convenience; it’s about crafting authentic images filled with feeling that couples will cherish for years to come! As photographer José Villa notes, natural light offers a unique quality, creating depth and dimension that feels wonderfully genuine and lasting.
Understanding the Role of Natural Light in Photography
The significance of natural light in photography is immense, especially for engagement sessions where genuine connection is paramount. Before exploring specific methods, we should build a solid understanding of what natural light involves and how it influences our photographic style. This foundation helps us make the most of this wonderful resource!
Definition and Characteristics of Natural Light
Natural light simply refers to light originating from the sun, whether direct or reflected. Its remarkable complexity and continuous change throughout the day make it quite special! This light possesses distinct traits that directly influence photography: intensity, direction, color temperature, and quality.
The intensity ranges widely, from the gentle light of dawn to the bright illumination of midday. Direction dictates how shadows define subjects, creating either pleasing contours or noticeable contrasts. Color temperature evolves from cool morning blues to warm sunset golds, while quality describes if the light is hard (producing defined shadows) or soft (yielding smooth transitions). Grasping these characteristics provides a fantastic creative palette! Seeing natural light as a variable we can interact with shifts photography from being reactive to becoming intentionally artistic.
Benefits and Limitations of Using Natural Light
The advantages of utilizing natural light extend well beyond cost savings. It fosters a relaxed setting during engagement sessions; without imposing lighting gear, couples often relax, forget the camera is there, and display their genuine bond! This authenticity is frequently what clients value most.
Another plus is the flattering aspect of well-managed natural light. Positioned correctly, it can soften skin tones, add a twinkle to eyes, and produce a dimensional appearance that feels romantic—ideal for engagement photography. However, we must also recognize natural light’s constraints. Its unpredictability can pose real hurdles – clouds might appear suddenly, altering a planned golden hour shoot entirely. We also can’t simply adjust its intensity like studio lights, demanding adaptability and skill to handle varying conditions gracefully! As photographer Elizabeth Messina points out, learning to find good light anywhere distinguishes professionals.
Key Natural Light Skills for Beautiful Engagement Photography
Developing skill with natural light forms the foundation of outstanding engagement photography. When we understand how to cooperate with light instead of fighting it, we produce images that feel authentic and full of life!
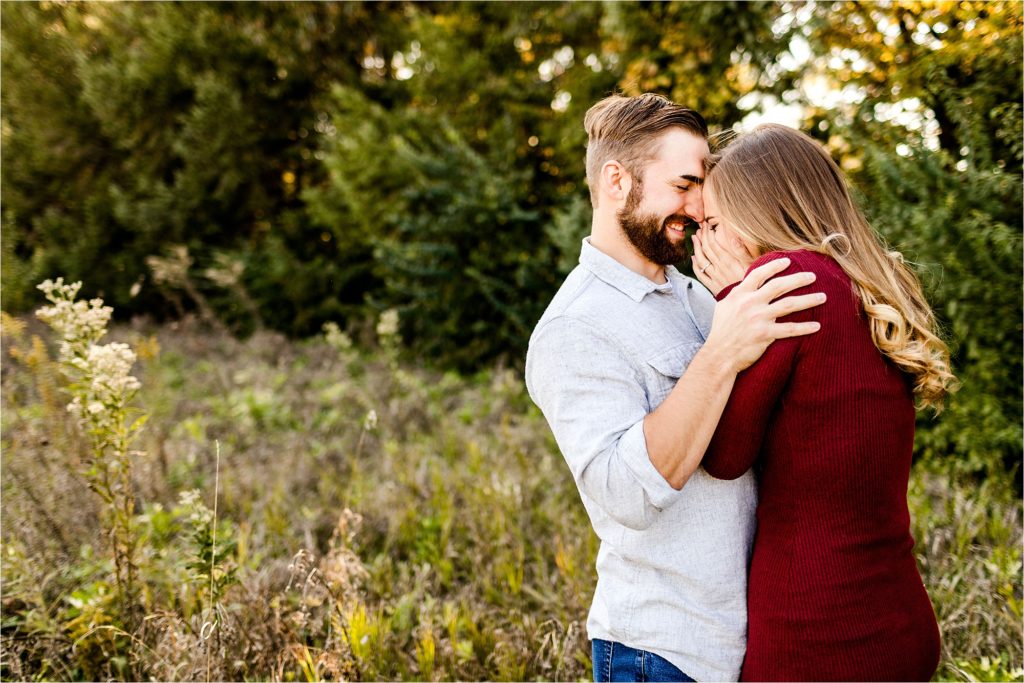
Making the Most of Golden Hour for Beautiful Engagement Photos
The allure of the golden hour is well-founded—it truly offers a superb time for portrait photography! During the hour after sunrise and before sunset, sunlight passes through more atmosphere, scattering harsher rays and bathing scenes in a warm, golden hue that enhances every skin tone. It’s a wonderful effect!
- Specific camera settings for golden hour:
- Aperture: f/2.8 – f/4.0
- Shutter speed: 1/60 – 1/200
- ISO: 100 – 400
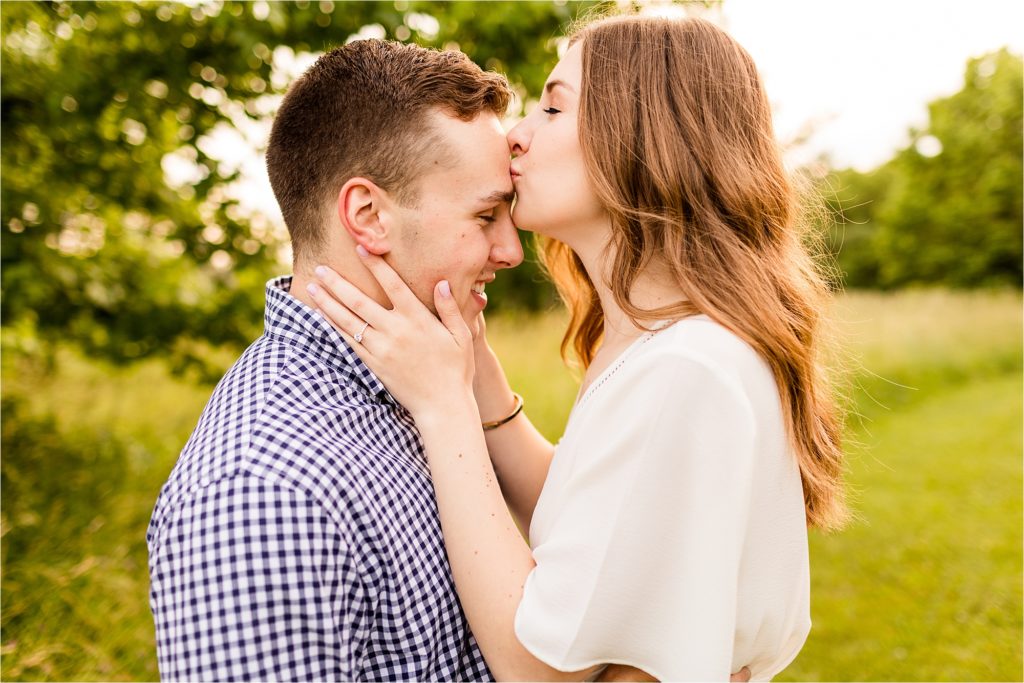
To maximize the golden hour, we recommend planning sessions to start at least 90 minutes before sunset. This allows couples time to settle in before the prime light arrives! Position couples with the sun behind them for that sought-after backlit radiance—this method yields a warm halo around their forms while helping avoid squinting and strong facial shadows. For exceptionally luminous golden hour portraits, photographer Jose Villa suggests positioning couples with the sun behind and exposing for skin tones, often overexposing slightly (1-2 stops) compared to the meter reading to achieve that glowing quality while keeping facial details clear.
- Before/After Example: Golden Hour Transformation
- Before: Front-lit couple at f/5.6, 1/200, ISO 100 — Harsh shadows on faces, squinting, flat appearance
- After: Backlit couple at f/2.8, 1/125, ISO 200 — Beautiful rim light, soft facial shadows, dimensional glow
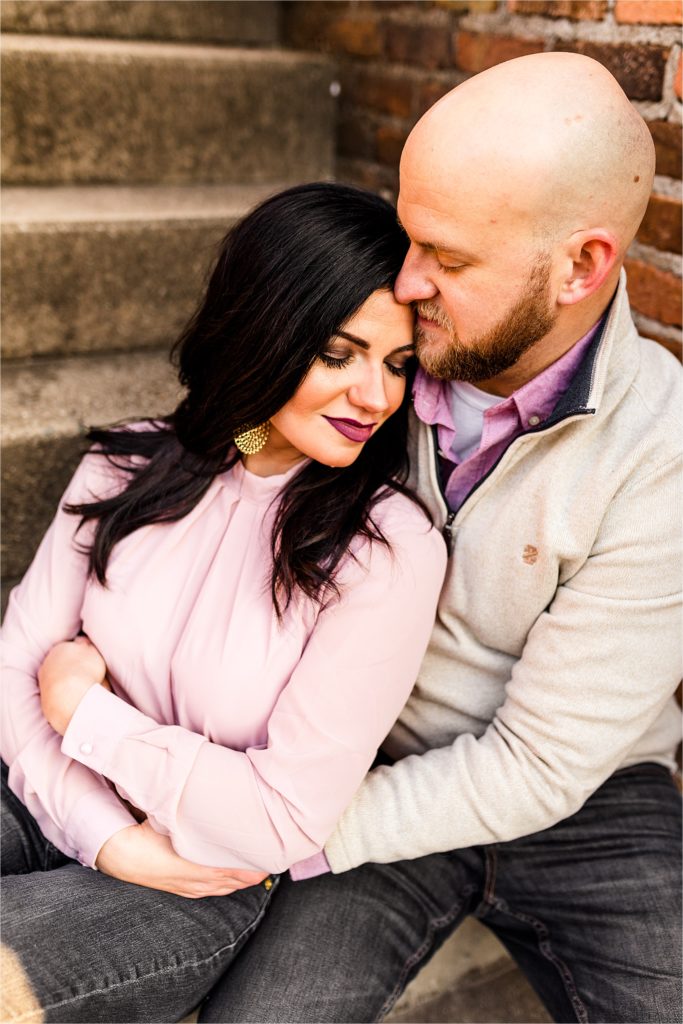
Utilizing Window Light for Indoor Sessions
Window light acts as a fantastic asset for indoor portrait photographers! This directional natural light source produces lovely dimension and contrast, often without extra equipment. Photographer Elizabeth Messina mentions that window light sculpts faces beautifully and often positions couples just 3-4 feet from a large window for very flattering results.
For pleasing indoor portraits, we can explore these specific setups:
- Side lighting (window to the side):
- Aperture: f/2.0 – f/2.8
- Shutter speed: 1/60 – 1/125
- ISO: 400 – 800
- Effect: Defined shadows that shape facial features and add dimension!
- Front lighting (subjects facing window):
- Aperture: f/2.8 – f/4.0
- Shutter speed: 1/60 – 1/125
- ISO: 200 – 400
- Effect: Even illumination with fewer shadows, great for bright, airy portraits.
- Back lighting (window behind subjects):
- Aperture: f/2.0 – f/2.8
- Shutter speed: 1/60 – 1/100
- ISO: 640 – 1000
- Effect: Atmospheric silhouettes and rim lighting when exposed correctly.
For additional refinement, try placing the couple about 4-6 feet from a large window, angled slightly toward the light source. This arrangement can create Rembrandt lighting—a classic, flattering pattern illuminating most of the face while casting a small triangular shadow on the opposite cheek. When dealing with bright window light, consider the shadow side of your subjects too! A simple white reflector can bounce light back to soften shadows and achieve balanced illumination.
Creating Depth with Backlighting and Silhouettes
Backlighting ranks among the most effective techniques available for natural light portrait photography! Industry surveys show that 32% of photographers employ backlighting to achieve a romantic, airy appearance in engagement sessions.
- Backlit portrait settings:
- Aperture: f/2.8 – f/5.6
- Shutter speed: 1/60 – 1/200
- ISO: 400 – 1600
To use backlighting well, proper exposure calculation is key. We need to meter for the subjects’ faces instead of the brighter background to prevent them from becoming dark shapes. If the camera finds this tricky, try spot metering on the brightest part of a subject’s face or use exposure compensation to brighten the overall image!
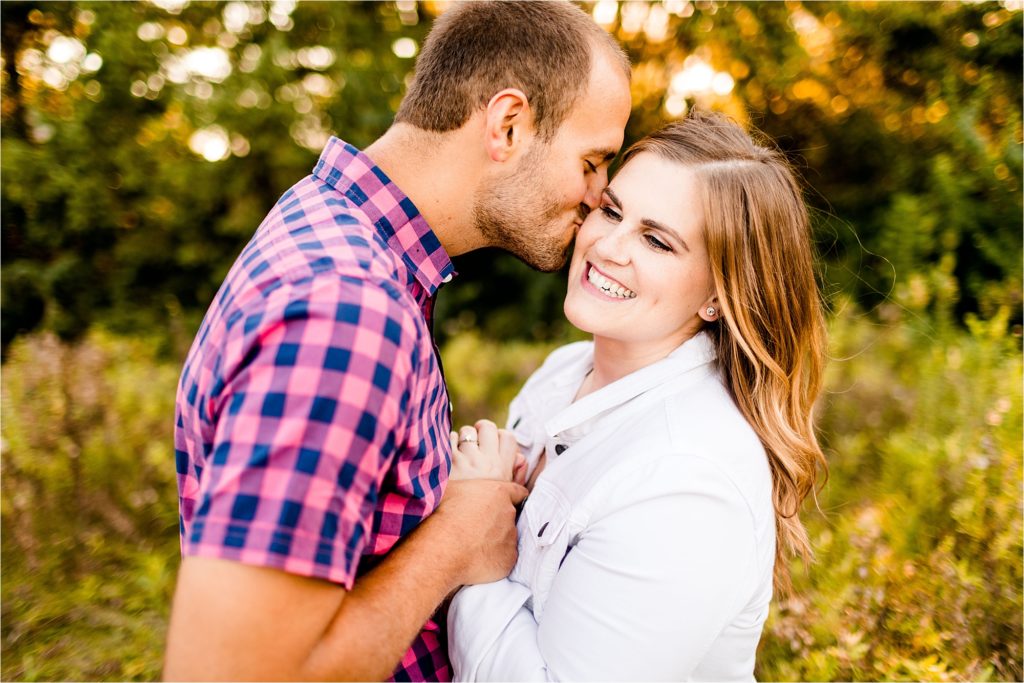
For striking silhouettes that emphasize shape and connection, deliberately underexpose by metering for the bright sky behind the couple. Pose subjects to form distinct profiles—having them touch foreheads, hold hands, or adopt other clear shapes works wonderfully for these artistic images. Photographer Jose Villa often exposes for the subject’s skin in backlit scenarios, allowing the background highlights to go bright, prioritizing the appearance of the subjects.
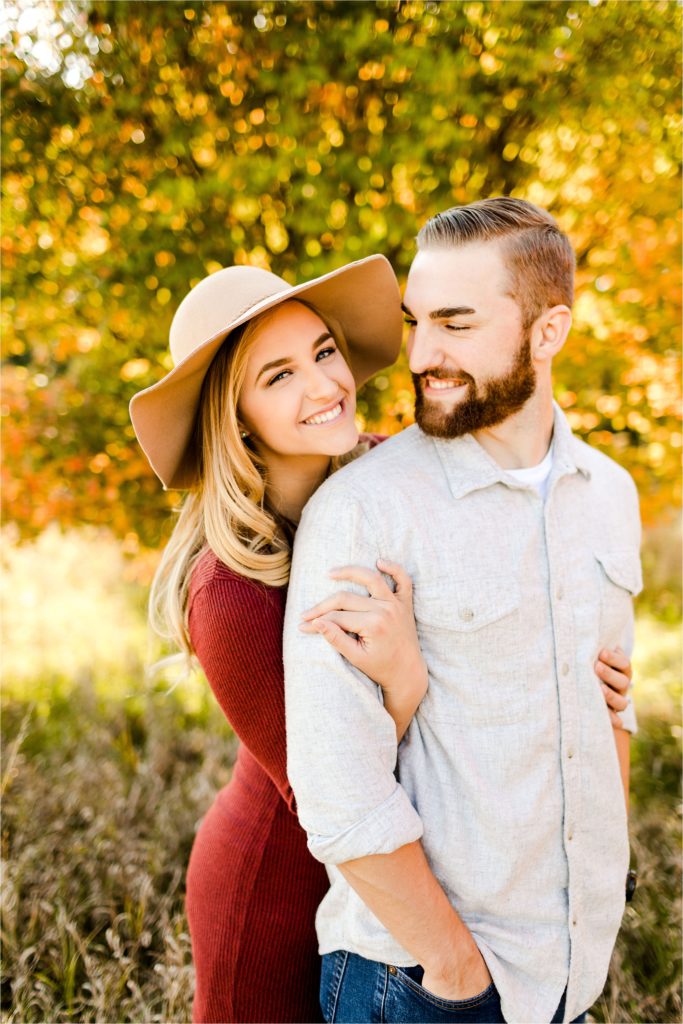
Embracing Overcast Skies for Soft and Even Lighting
While some photographers might feel discouraged by cloudy days, experienced professionals recognize that overcast skies offer some of the most flattering conditions for portraits! Think of clouds as nature’s giant softbox—they diffuse sunlight, producing even illumination without strong shadows. What a great built-in tool!
- Overcast day settings:
- Aperture: f/2.0 – f/4.0
- Shutter speed: 1/125 – 1/250
- ISO: 200 – 800
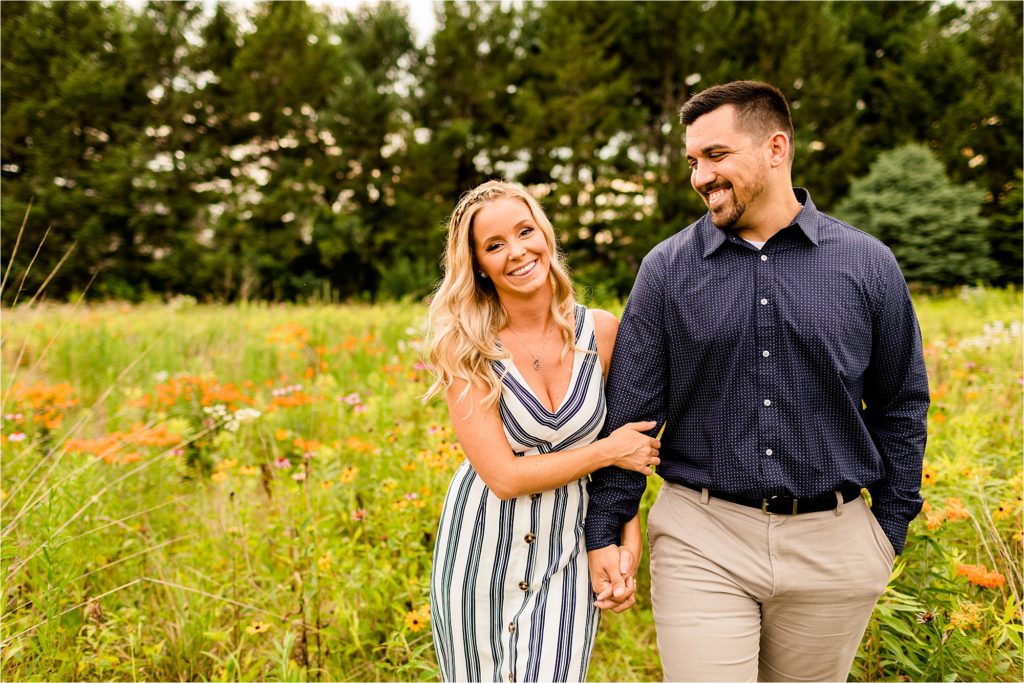
On overcast days, we gain incredible freedom of movement. Without needing to track the sun’s exact position, we can shoot from almost any direction and concentrate fully on composition and capturing the couple’s connection. This flexibility proves invaluable during engagement sessions! The soft, even light is particularly pleasing for close-ups, showing texture and detail without the stark contrast direct sun creates. Skin often looks smoother, colors appear richer, and eyes gain a gentle sparkle that feels natural. To avoid a potentially “flat” appearance sometimes associated with overcast light, focus on creating depth through positioning and composition. Have the couple stand near darker elements like trees or buildings for natural contrast, or use a shallow depth of field to separate them from the background.
Overcoming Challenges with Natural Light Photography
Every engagement photographer understands that natural light, while often beautiful, can also be unpredictable! Instead of viewing these situations as setbacks, we can learn to embrace them as chances for creative problem-solving. Let’s turn challenges into opportunities!
Dealing with Harsh Noon Sunlight: Tips and Tricks
Noon sunlight often gets a bad reputation—its harsh, overhead quality can create less-than-ideal shadows under eyes, noses, and chins. However, with a few smart techniques, we can manage this difficult light and still create wonderful images anytime!
- Harsh midday settings:
- Aperture: f/8 – f/16
- Shutter speed: 1/200 – 1/2000
- ISO: 100 – 200
A reliable approach for midday sessions involves finding “open shade”—areas shielded from direct sun but still illuminated by ambient light from the sky. Position the couple under a large tree’s canopy, beneath an awning, or in a building’s shadow, making sure they face towards the open sky. Another effective method is to utilize backlighting. Place the sun behind the couple and expose for their skin tones. This avoids squinting and strong facial shadows while adding a nice rim light. To prevent underexposed faces, use a reflector positioned low and angled up to bounce light back onto them!
- Before/After Example: Harsh Midday Light
- Before: Direct overhead sun at f/5.6, 1/250, ISO 100 — Harsh shadows under eyes, blown-out highlights
- After: Open shade at f/4.0, 1/250, ISO 200 with reflector fill — Even illumination, no harsh shadows, comfortable subjects
Balancing Shadows and Highlights in Your Compositions
Achieving balanced images with natural light involves skillfully managing the interplay between shadows and highlights. When handled well, this contrast adds dimension and depth instead of being distracting! A common concern couples mention about engagement photos relates to inconsistent lighting or strong shadows. To address this, we practice the “exposure triangle dance“—adjusting aperture, shutter speed, and ISO thoughtfully in response to the light.
For scenes with high contrast, generally expose for the highlights (often the subject’s face) and let the shadows land naturally. Modern cameras possess impressive dynamic range, allowing recovery of shadow detail later in post-processing if needed! Photographer Elizabeth Messina advises using contrast intentionally rather than fighting it, noting that sometimes deeper shadows contribute to dramatic, impactful portraits.
Adapting to Changing Weather Conditions
Weather shifts can disrupt even meticulously planned engagement sessions, but adaptability truly marks a professional approach! Instead of resisting changing conditions, we can learn to integrate them creatively. When clouds appear unexpectedly, shift the creative aim from sunny portraits to perhaps moodier, atmospheric images. Cloudy skies offer soft, even light that works beautifully for close-ups!
Maintain backup locations offering different lighting possibilities. Scout indoor spots with appealing window light, covered areas featuring interesting backgrounds, or urban structures that can serve as temporary shooting spaces. Preparedness with alternatives means we always have options! For rapidly changing light, practice “chasing light pockets”—those instances when sun breaks through clouds, creating dramatic spotlight effects. These brief chances can yield some incredibly striking photos!
Advanced Techniques for Controlling Natural Light
While natural light photography is often praised for authenticity, skilled engagement photographers know “natural” doesn’t have to mean “uncontrolled.” By employing advanced methods to shape and direct available light, we can elevate work from simply recording what’s present to deliberately crafting light for greater artistic effect!
Using Reflectors and Diffusers to Manipulate Light
Reflectors and diffusers are fantastic tools for the natural light photographer, providing precise control without flash systems! The real skill lies not just in having these tools, but knowing how and when to use them effectively. A 5-in-1 reflector is incredibly versatile for engagement sessions. Each surface provides distinct effects:
- Silver: Bright, high-contrast fill
- Gold: Warm, glowing fill
- White: Subtle, natural-looking fill
- Black: Negative fill (absorbs light) to deepen shadows
- Translucent: Diffusion panel for softening harsh light
Industry surveys reveal 28% of photographers use diffusers and softboxes to shape flattering light for couples. These tools effectively soften harsh direct sunlight into gentle illumination suitable for all skin types! An advanced technique involves “sandwich lighting”: place a translucent diffuser between the couple and the sun, with a reflector positioned on the opposite side. This setup wraps subjects in soft, even light from two directions – wonderful for close-up portraits!
- Before/After Example: Reflector Impact
- Before: Backlit couple at f/2.8, 1/200, ISO 400 — Dark faces, bright background
- After: Backlit with gold reflector at f/2.8, 1/200, ISO 400 — Warm fill on faces, maintained backlit glow
Experimenting with Natural Light Filters
Filters provide another layer of creative influence, capable of turning ordinary natural light into something extraordinary! While often associated with landscape work, filters can significantly enhance engagement portraits when applied thoughtfully. Polarizing filters boost color saturation and contrast—very helpful for deepening blue skies and making foliage look more vibrant. When shooting near reflective surfaces like windows or water, a polarizer helps minimize distracting reflections while keeping natural light on faces!
Neutral density (ND) filters permit wider apertures even in bright conditions, helping create soft backgrounds with pleasing bokeh. For couples desiring portraits near water, ND filters allow for smooth water effects, adding a lovely quality to images. Photographer Jose Villa mentions always having polarizers and ND filters available to maintain a consistent style regardless of the time of day.
Leveraging the Surroundings for Creative Shadow Play
An often overlooked technique is intentional shadow play—using elements in the environment to create patterns of light and shadow that add depth and visual appeal! Look for natural features like tree branches or lattice that cast interesting patterns. Position the couple so these shadows fall deliberately across them. Architecture offers numerous chances for creative shadow work, with urban settings providing distinct shadows that shift throughout the day! Recent trends show 23% of photographers are exploring more dramatic lighting styles for engagement shoots, incorporating creative shadow play for visual interest.
Troubleshooting Common Natural Light Problems
Even seasoned photographers encounter typical hurdles with natural light. Here are quick fixes for frequent lighting issues we might face during engagement sessions:
1. Harsh Raccoon Eyes at Midday
- Problem: Overhead sun causing dark shadows in eye sockets.
- Solution: Move subjects to open shade, use a reflector placed low and angled up, or change orientation so the sun provides backlighting instead!
- Settings: In open shade, try f/4.0, 1/250, ISO 200.
2. Blown-Out Backgrounds in Backlit Scenes
- Problem: Faces are well-exposed, but the background is completely white.
- Solution: Use spot metering on faces, slightly underexpose to keep some background detail, and recover shadow detail later if needed.
- Settings: Try f/2.8, 1/500, ISO 200 with spot metering on faces.
3. Dull, Flat Light on Overcast Days
- Problem: Images lack dimension.
- Solution: Introduce contrast by positioning couples near darker elements (trees, buildings) or use distance/shallow depth of field to separate them from the background.
- Settings: Open aperture to f/2.0-f/2.8 for background separation.
4. Mixed Light Sources (Shade + Sun)
- Problem: Part of the scene is bright sun, another part is shade.
- Solution: Expose for one zone (usually where faces are), use reflectors to balance the light difference, or embrace the contrast creatively!
- Settings: Expose for faces using spot metering.
5. Low Light at End of Golden Hour
- Problem: Light fading rapidly near sunset.
- Solution: Increase ISO progressively, use wider apertures, and slower shutter speeds (if couple can remain still!).
- Settings: Start around f/2.0, 1/125, ISO 800 and adjust.
6. Color Cast from Surroundings
- Problem: Nearby colored surfaces reflecting unwanted tints onto skin.
- Solution: Reposition the couple away from the colored surface or adjust white balance appropriately (a gray card helps!).
- Settings: Use custom white balance.
7. Lens Flare Overwhelming Images
- Problem: Sun in frame causing excessive flare, reducing contrast.
- Solution: Use a hand or assistant to block direct sun from hitting the lens (just out of frame), utilize a lens hood, or incorporate flare artistically!
- Settings: Maintain exposure, focus on shading the lens.
Practical Tips for Preparing and Planning Your Shoot
The difference between good and truly great engagement photos often lies in preparation! While spontaneity is wonderful, thoughtful planning helps us maximize natural light and consistently deliver beautiful images.
Scouting Locations to Maximize Natural Light Opportunities
Location scouting is perhaps the most vital preparation step for a natural light session! Visiting potential spots at the same time of day planned for the shoot, ideally a few days prior, reveals exactly how light behaves there. It’s amazing what we learn! When scouting, look past just the scenery and analyze lighting characteristics:
- Does it provide open shade for midday?
- Are there light-colored walls or water features to act as natural reflectors?
- Does it offer both east and west-facing perspectives for different times?
We find creating a personal location guide with notes on ideal shooting times incredibly useful! Documenting how light works in various spots throughout the day and seasons builds an invaluable resource for adapting quickly to changes.
Communicating with Clients About Light Expectations
Many clients arrive inspired by golden hour photos but hope to schedule at noon for convenience. Educating them gently about how light affects their photos and managing expectations early on is part of our professional role! During consultations, include a brief “light chat.” Showing before-and-after examples of the same location at different times visually demonstrates the impact far better than words alone!
Developing a pre-session guide with clothing suggestions optimized for natural light is also helpful. Suggesting neutral, light-colored outfits that reflect light, and explaining how certain colors photograph in various light, helps couples prepare effectively!
Top Gear Picks for Natural Light Photography Sessions
While natural light work often needs less gear than studio setups, having suitable tools enhances results significantly! Here are some key items for capturing lovely natural light portraits:
- A camera with excellent dynamic range to handle contrasty scenes.
- Fast prime lenses (like 35mm f/1.4, 85mm f/1.8) for nice background blur.
- A 5-in-1 reflector for flexible light shaping.
- Neutral density (ND) filters to allow wide apertures in bright sun.
- A handheld light meter for precise readings in tricky light.
- A small LED panel for subtle fill light when needed.
- Polarizing filters to manage reflections and boost color.
Good gear integrates smoothly into the process, letting us focus on connecting with couples and creating wonderful images!
Capturing Emotions and Moments with Natural Light
True engagement photography goes beyond technical skill; it involves capturing genuine feelings and connections! Natural light photographers recognize that beautiful light acts as both a practical tool and a potent storytelling component.
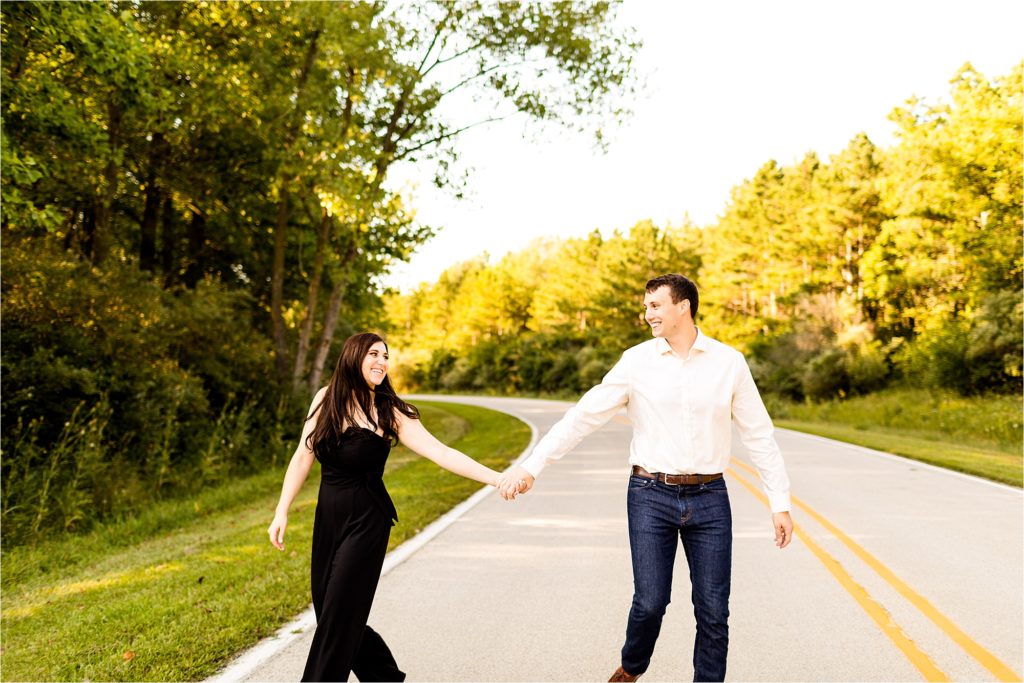
Directing Couples to Interact Naturally with the Light
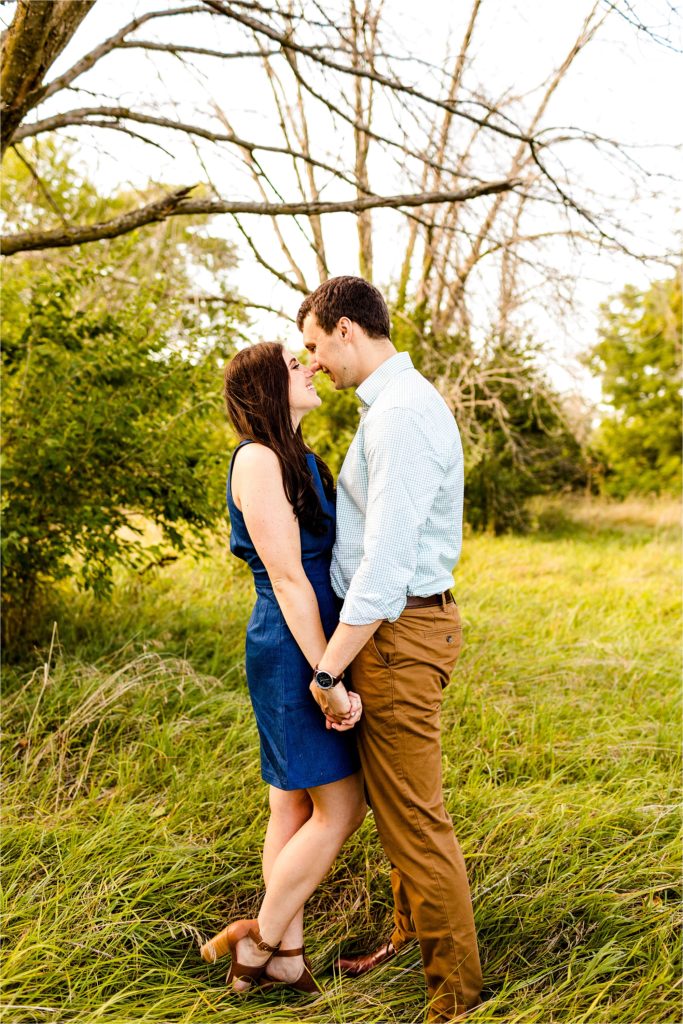
Many couples feel a bit awkward initially in front of the camera. As natural light photographers, we can help them relax by encouraging interaction with the environment, especially the light! This helps shift focus away from self-consciousness. Instead of rigid poses, try movement-based prompts that naturally guide couples into good light. For instance, with golden hour backlight: “Walk slowly towards that glow between the trees, and halfway there, turn to each other and maybe share something you’re excited about for the wedding.” This creates natural movement, perfect positioning, and often elicits genuine responses!
Photographer Elizabeth Messina suggests guiding couples to connect with each other and the surroundings rather than just telling them to smile. Authentic reactions to light—like turning faces toward warmth or closing eyes gently in bright sun—often yield the most heartfelt images.
Storytelling through Light and Composition
Light serves as a powerful narrative tool in photography, conveying mood and context effectively! While technical perfection is important, the most captivating natural light photos tell stories using light quality, direction, and intensity with intention.
Consider how different light qualities evoke varied feelings:
- Soft, diffused light suggests intimacy, ideal for tender interactions.
- Dramatic backlight with some flare can add a sense of joyful energy!
- Deep shadows paired with bright areas create intriguing, atmospheric narratives.
Matching light choices to the couple’s personality helps images feel authentically theirs! Composition collaborates with light to guide the viewer’s eye. Using leading lines formed by light and shadow can draw attention effectively to the couple. Engagement photos represent visual chapters in a couple’s story. When curating the final images, think about how they work together narratively. Include wider shots showing context, mid-distance images displaying interaction, and close-ups revealing feeling and detail.
Building Your Portfolio: Leveraging Natural Light Photography
A fantastic portfolio showcasing mastery of natural light can truly distinguish a photographer in today’s market! Whether starting out or aiming to elevate an existing business, strategically building and marketing a portfolio centered on natural light skills attracts ideal clients.
Showcasing Diverse Lighting Techniques in Your Work
The strongest natural light portfolios display versatility while keeping a cohesive style. Instead of just gathering favorite shots, curate the portfolio strategically to demonstrate skill across various lighting situations clients might face! We find organizing work into clear lighting categories helpful:
- Golden hour backlighting examples
- Open shade portraits
- Dramatic side-lit images
- Window light scenarios
- Solutions for challenging midday light
This approach reassures potential clients that beautiful natural light photos are possible regardless of timing or weather—a compelling advantage! When choosing portfolio pieces, highlight technical skill shown in tricky lighting. Using before-and-after examples in educational materials can powerfully demonstrate expertise.
Marketing Your Skills as a Natural Light Specialist
Positioning oneself specifically as a natural light engagement (or wedding) photography specialist can attract clients specifically seeking that aesthetic! Identify the unique advantages natural light offers—authenticity, flattering tones, environmental connection—and build marketing messages around these benefits. Creating educational content like blog posts (“How to Prepare for Your Natural Light Engagement Session,” “Best Times for Natural Light Photos”) provides value while attracting search traffic from interested couples!
On social media, maintain a consistent strategy highlighting different facets of natural light expertise. Go beyond just sharing pretty photos; add context about the lighting, use keywords, challenges overcome, or setting choices. Client testimonials mentioning skill with natural light add significant credibility! After sessions, gently ask clients about their experience, perhaps inquiring, “What did you think about the locations and lighting we chose?”
Conclusion: Embracing the Art and Science of Natural Light in Engagement Photography
The path to proficiency with natural light for engagement photography involves both technical learning and artistic growth! Understanding how to utilize available light goes beyond settings or ideal conditions; it means developing an intuitive connection with light that enables creation of authentic images filled with feeling, whatever the circumstances!
The value of natural light goes far past simple convenience. It connects us to something genuine and enduring—the same kind of light that has illuminated love stories for ages. When we photograph couples in natural light, we position them within this flow, resulting in images that feel real and linked to something beyond just that instance! Its incredible versatility is a huge asset. From sunset’s warmth to the soft diffusion of clouds, dramatic window illumination to dappled shadows—each scenario provides unique ways to showcase a couple’s bond.
Successful engagement photographers don’t merely understand natural light; they cultivate a relationship with it! They learn to spot potential where others might see difficulty, find appeal in less-than-perfect conditions, and actively shape light rather than just accepting it. As photographer Elizabeth Messina beautifully puts it, with natural light, we learn to see the existing beauty, position ourselves and couples within it, and capture the genuineness of both light and love. That truly contributes to timeless images!
Affiliate Disclosure: Some links in this post are affiliate links, meaning we may earn a commission if you make a purchase through our links, at no extra cost to you. As wedding photographers ourselves, we only recommend gear we’ve thoroughly researched or would use in our own business. Your support helps us continue creating valuable content for the photography community.

-12")


