-8")


When the sun dips below the horizon, a wedding transforms into something magical. The soft glow of string lights, the shimmer of candlelight on faces, and the intimate atmosphere of evening celebrations create perfect moments waiting to be captured. Nighttime wedding photography isn’t just a technical challenge—it’s an opportunity to create breathtaking images that tell a different story than their daytime counterparts. As a wedding photographer who’s navigated countless evening receptions and after-dark portrait sessions, I can tell you that mastering the art of nighttime photography will elevate your entire portfolio and give your couples memories they’ll treasure forever.
But how do you make the most of these low-light instants without losing the warmth and intimacy that make them so special? It all starts with the right gear and techniques! Using a camera that excels in low-light conditions—like the ones in this guide to the best mirrorless cameras for wedding photography—can make a huge difference in capturing crisp, vibrant images after dark. Pair that with the right wedding photography gear, and you’ll be ready to handle everything from romantic candlelit portraits to high-energy dance floors.
Thoughtful preparation during the earlier parts of the day, like setting up beautifully lit getting ready photos, can also help create a visual story that flows seamlessly from daylight to night. And if an unexpected challenge, like rain, adds an extra layer of drama, don’t worry—rainy-day wedding photography can lead to some of the most artistic and romantic shots of the night!
Table of Contents
- Understanding Nighttime Wedding Photography
- Preparing for Nighttime Wedding Photography
- Creative Lighting Techniques for Capturing Beautiful Shots
- Perfecting Camera Settings for Low-Light Conditions
- Creative Composition Ideas for Capturing Unforgettable Shots
- Conclusion: Taking Your Wedding Photography Portfolio to the Next Level
Understanding Nighttime Wedding Photography
What Makes Nighttime Wedding Photos Unique?
There’s something undeniably captivating about nighttime wedding photography! Unlike daytime shots, where natural light does most of the work, evening photography turns artificial lighting into an artistic tool. The dance between light and shadow adds depth, mood, and an intimate storytelling element that simply can’t be replicated in broad daylight. These images often carry a romantic, dreamlike quality, where the couple emerges from darkness into beautifully curated instants of illumination!
The contrast between warm artificial lighting and the deep blues of the evening sky creates a one-of-a-kind color palette that makes nighttime wedding photos feel cinematic. Each light source—whether it’s twinkling string lights, the glow of candles, or venue up lighting—adds character and richness to every frame! Over the years, I’ve found that these elements combine to create dramatic, emotionally charged images that feel both timeless and modern all at once.
The Importance of Including Night Shots in Wedding Portfolios
Incorporating nighttime wedding photography into your portfolio showcases your adaptability and expertise—qualities that couples actively look for when choosing a photographer! These moody, atmospheric images often become the standout shots that couples display in their homes, the ones that don’t only capture how the moment looked, but how it felt.
Night shots also highlight your ability to problem-solve and create great work in challenging conditions! They prove that no matter the lighting situation, you can deliver something spectacular, building trust with potential clients who want a photographer that can handle any part of their wedding day. Over time, I’ve noticed that showcasing nighttime wedding images draws in couples specifically seeking that bold, artistic touch for their celebration!
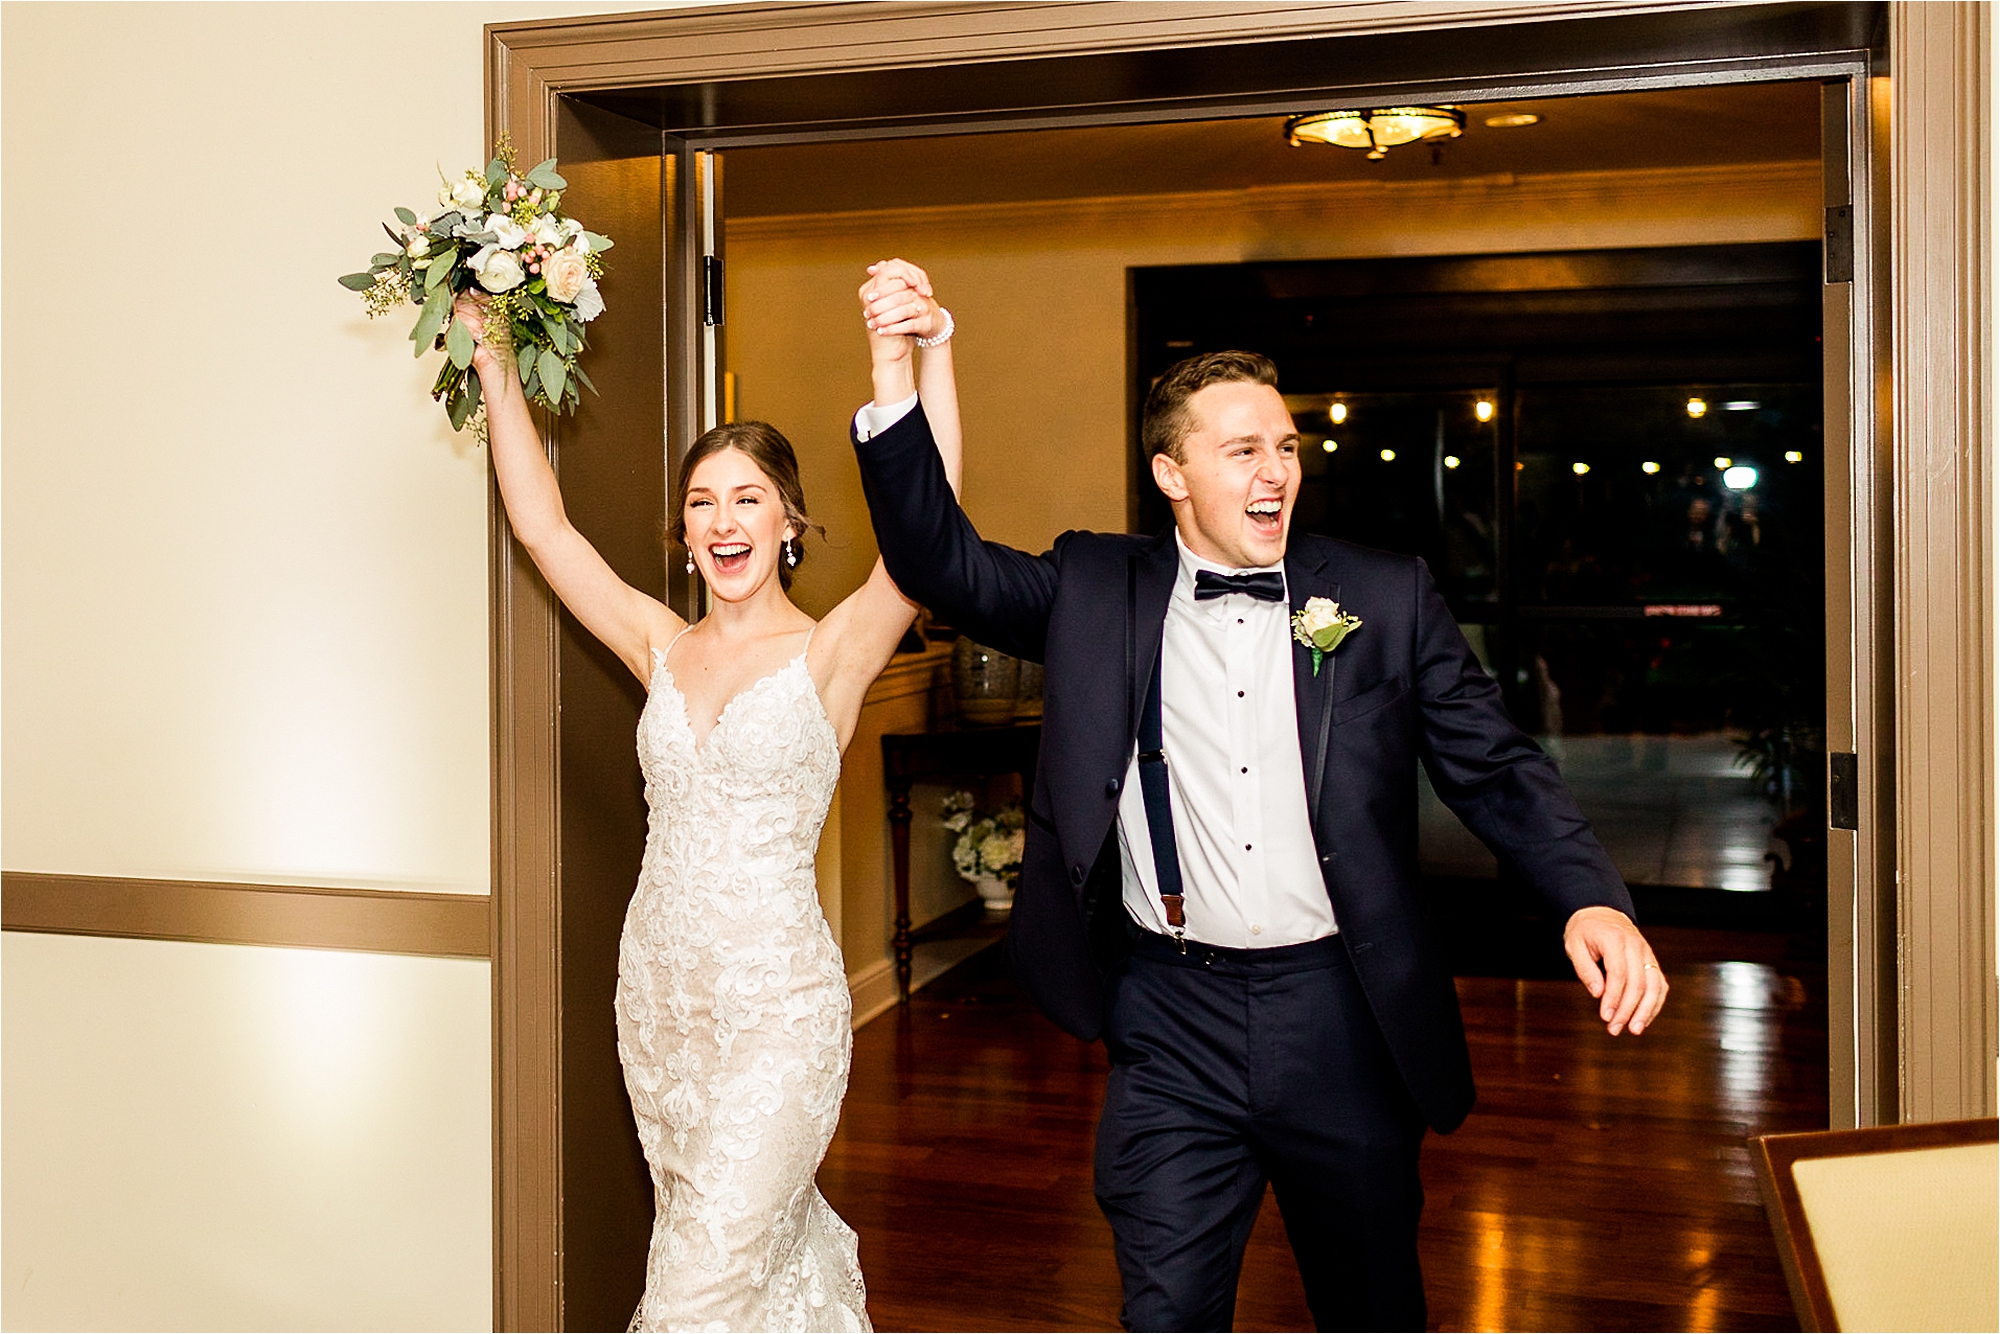
Beyond the marketing perks, nighttime photos add incredible variety to a wedding story! While daytime images highlight the energy and vibrant details of the celebration, night shots bring out the romance and quiet intimacy that unfolds as the evening progresses. The transition from golden hour to nighttime creates stunning opportunities to capture couples at their most connected, allowing for images that feel deeply personal and beautifully unique!
Preparing for Nighttime Wedding Photography
Understanding the Challenges: Low Light and Technical Hurdles
Nighttime wedding photography is a beautiful paradox—the same darkness that creates a magical ambiance also brings a unique set of technical challenges! Low-light conditions push both you and your equipment to the limit. Autofocus systems struggle to lock onto subjects, camera sensors fight to capture detail without introducing noise, and handheld shooting becomes trickier as shutter speeds slow down!
The dynamic range at night can be extreme, with bright ceremony lights set against deep shadows. Finding the right exposure balance is a constant challenge—if you expose for the highlights, your couple disappears into darkness; expose for your subjects, and light sources can become harsh and overexposed!
Color balance is another hurdle, especially in outdoor night weddings where multiple light sources—tungsten, LEDs, moonlight—blend together in unexpected ways. These mixed lighting conditions can create unnatural skin tones, making it important to understand how to balance different color temperatures. The goal? Images that feel true to the scene while still keeping your subjects looking their best!
Gathering the Right Equipment: Essential Gear for Night Photography
Success in nighttime wedding photography starts with the right gear! Fast lenses with wide apertures (f/2.8 or wider) are a must, as they let in more light to keep images crisp. My go-to setup? A 24-70mm f/2.8 for versatility, paired with a 50mm or 85mm f/1.4 for those dreamy, ultra-low-light portraits!
Camera choice also plays a huge role. A full-frame body with strong high-ISO performance is key—modern models can handle ISO 3200-6400 with impressive results. But even the best camera can only do so much, which is why I always bring multiple light sources to control the scene:
- A reliable flash system with off-camera capabilities for dramatic lighting!
- Small LED continuous lights for video work and creative effects!
- Various light modifiers like softboxes and bounce cards to shape and soften light!
- Colored gels to match ambient lighting or add a stylistic touch!
With the right combination of skill, adaptability, and gear, nighttime wedding photography transforms from a challenge into an opportunity to create some of the most striking, cinematic images in a wedding album!
When shooting receptions, I frequently use bounce flash techniques, directing light off walls or ceilings to create softer, more natural-looking illumination. For stable long exposures during ceremony lighting instants or creative nighttime portraits, a sturdy tripod is important equipment.
The right gear goes beyond cameras and lenses—practical accessories can make or break a nighttime wedding shoot! Extra batteries are a must since flash units drain power quickly, and you’ll want plenty of memory cards to capture every moment without worry. A powerful headlamp or flashlight is also important—not for navigating dark venues, but for assisting with focusing in tricky low-light situations!
Finding the Perfect Location: Tips for Scouting Nighttime Venues
Scouting locations takes on a whole new level of importance for nighttime weddings! I always visit venues at the same time of day (or night) that I’ll be photographing there. A space that looks great in daylight can feel completely different after sunset, and planning ahead secures you’re ready to work with the available light instead of fighting against it!
When scouting, don’t only focus on the obvious. Seek out interesting light sources that can enhance your compositions—architectural lighting, string lights, and even streetlamps can add creative flair instead of becoming obstacles! Consider how venue features might play into your shots, like reflective surfaces such as glass windows, polished floors, or water features that can amplify the glow of surrounding lights. Silhouettes and reflections can add drama and depth to nighttime images!
For outdoor locations, pay attention to how moonlight might impact your scene and be aware of any light pollution from nearby buildings or streets. What looks pitch black to the eye might actually reveal unexpected color casts when captured in a long exposure!
And don’t forget the practical details! Identify stable surfaces where off-camera flashes can be placed, locate power outlets for charging equipment, and consider backup plans in case of unpredictable weather.
Creative Lighting Techniques for Capturing Beautiful Shots
Choosing the Right Light Sources: Natural vs Artificial Lighting
Even at an outdoor nighttime wedding, you’d be surprised at how many light sources you have to work with! The key is knowing which ones align with your creative vision. Natural light doesn’t vanish completely after sunset—the moon, stars, and even the ambient glow of twilight can add subtle illumination, shaping the atmosphere in your images!
One of my favorite lighting instants? The soft blue glow of dusk, often called “blue hour!” This brief but incredible window offers a balanced exposure between the darkening sky and the warm glow of ceremony and venue lighting. During these fleeting minutes, I love positioning couples against the twilight backdrop, using that natural, moody blue as a giant soft canvas while gently filling their faces with controlled artificial light!
When natural light fades completely, understanding artificial lighting is important! Most venues use a mix of tungsten, LED, and even fluorescent lights, each with distinct color temperatures that can impact skin tones and overall color balance. Before capturing key instants, I always take a few test shots to see how the venue’s lighting interacts with my camera settings—this helps me decide whether to supplement it and how to blend everything seamlessly!
Artificial lighting shouldn’t feel artificial! With the right techniques, added light can complement the existing ambiance rather than overpower it. The goal is for viewers to see a beautifully lit moment without ever thinking about how it was created!
Utilizing Off-Camera Flash for Dramatic Effects
Off-camera flash is my secret weapon for turning ordinary nighttime wedding shots into showstopping images! Positioning flashes away from the camera creates directional light that adds depth, drama, and an extra layer of artistry to your compositions!
One technique I frequently employ is placing a flash behind the couple to create rim lighting, which separates them from dark backgrounds while adding a beautiful glow around their silhouettes. This approach is particularly effective during first dances where venue lighting is often minimal.
For outdoor nighttime portraits, off-camera flash is a game-changer! I often use multiple flashes to create depth and drama—one as a key light positioned at a 45-degree angle to the couple, another as a rim light behind them, and sometimes a third to illuminate background elements like trees or architectural features. With radio triggers, I have complete control over each flash’s intensity, ensuring a balanced exposure that highlights both the couple and their surroundings!
Colored gels take this technique even further, transforming ordinary scenes into something extraordinary. I often use warming gels to match the ambient tungsten lighting at receptions or blue gels to mimic moonlight for outdoor portraits. Getting color temperature right makes all the difference in blending artificial light seamlessly with the environment!
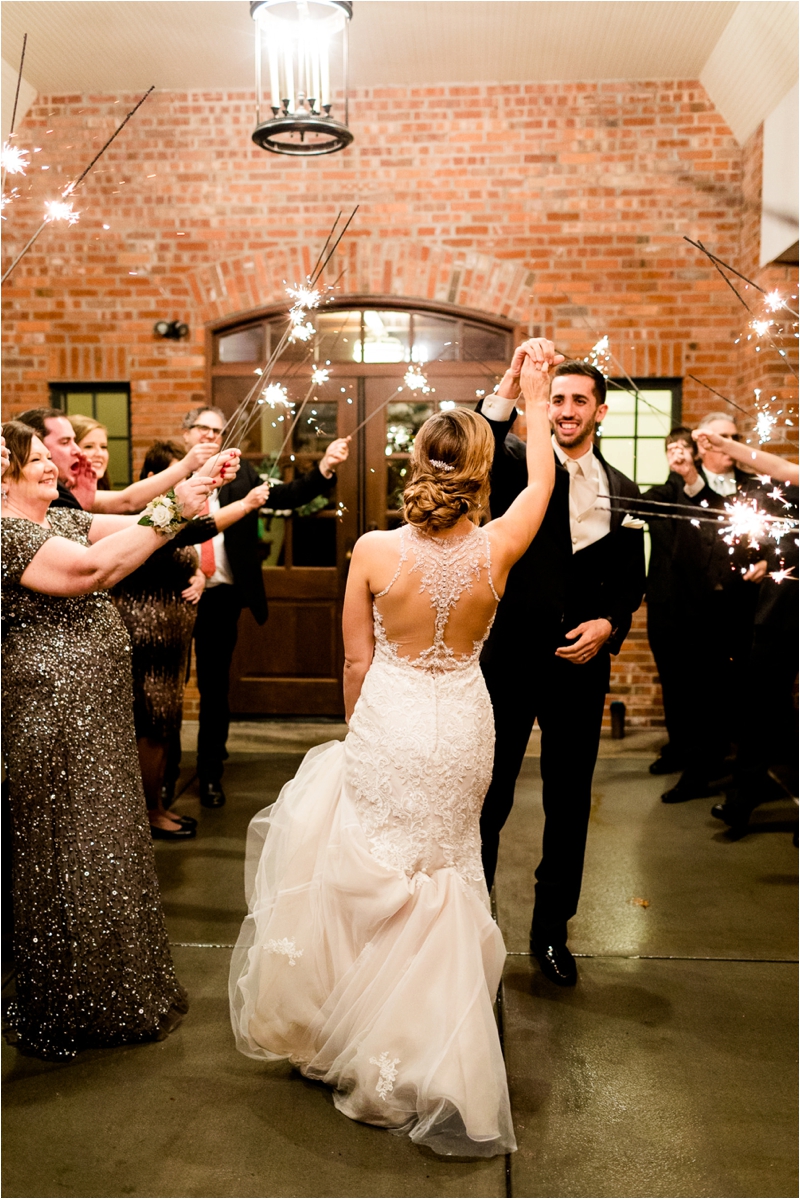
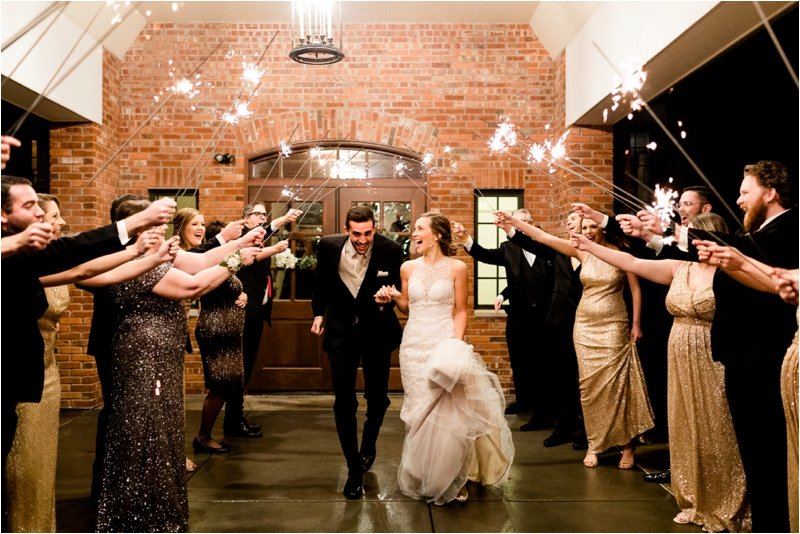
Experimenting with Sparklers, Fairy Lights, and Candles
Some of the most magical nighttime wedding photos incorporate creative light sources that serve as both illumination and visual elements!
✔ Sparklers: These have become a favorite for nighttime photography, creating glowing trails of light that can frame couples or even spell out words in long exposures! I typically set my shutter speed around 1/15th of a second to capture both the couple’s expressions and the movement of the light for a dreamy effect!
✔ Fairy Lights: These tiny lights are incredibly versatile for outdoor night weddings! I always keep a few strands in my bag for impromptu light painting or to create bokeh-filled backdrops. By placing them in the background and shooting with a wide aperture, you can achieve a magical, glittering effect that adds depth and wonder to portraits!
✔ Candles: Few light sources are as romantic as candlelight! Their warm, flattering glow naturally draws attention to your subjects. When photographing candle-lit scenes, I slightly underexpose from what my meter suggests to maintain the intimate mood. The trick? Balancing exposure between the bright flame and the soft light it casts—this is where spot metering becomes your best friend!
For next-level creativity, I love combining these elements with long exposure photography! Having the couple remain still while an assistant moves a light source around them can produce surreal, dreamlike images that capture both the moment and its energy. These techniques take practice, but they create signature images that couples can’t get enough of!
Perfecting Camera Settings for Low-Light Conditions

Adjusting ISO, Shutter Speed, and Aperture for Optimal Results
Learning the exposure triangle is even more critical when shooting wedding photos in the dark! Every setting involves a trade-off between light, sharpness, and noise control, so knowing how to balance them is key.
✔ Aperture: I always start here! Fast lenses at f/1.4 to f/2.8 let in maximum light, making them ideal for nighttime portraits. But keep in mind—extremely wide apertures create a shallow depth of field, which is great for dreamy solo shots but tricky for group portraits. In those cases, I stop down slightly to f/3.5-4 and adjust my other settings accordingly!
✔ ISO: This is where things get delicate. While modern cameras handle high ISOs impressively, every sensor has its limits before noise becomes distracting. Through experience, I’ve found that ISO 3200 is my sweet spot for critical shots, but I’ll push to 6400 if it means capturing an important, fleeting moment. A slightly noisy but sharp image is always better than a clean but blurry one!
✔ Shutter Speed: This setting depends entirely on the situation. For still subjects on a tripod, I can extend shutter speed significantly—even several seconds for creative effects. For handheld shots, I follow the reciprocal rule as a baseline (1/focal length), though modern image stabilization lets me shoot 2-3 stops slower. When capturing dancing or action shots, I prioritize freezing motion with a shutter speed of at least 1/160th of a second, even if it means bumping up my ISO!
Tips for Achieving Sharp Focus in the Dark
Focusing accurately in low light is one of the biggest challenges in nighttime wedding photography! When autofocus struggles, these techniques help secure sharp, crisp images:
✔ Use an AF Assist Beam or Flashlight: A quick burst of light provides the contrast your autofocus system needs to lock onto your subject. This method is especially helpful for portraits and won’t affect the final image!
✔ Switch to Manual Focus for Static Subjects: When photographing still instants—like couple portraits—I often use my camera’s focus magnification feature to dial in accuracy manually!
✔ Use Continuous Autofocus for Moving Subjects: In dark reception venues, I switch to AF-C mode and limit the number of focus points. This prevents the camera from hunting across the entire frame and helps it track the subject more reliably!
✔ Position Yourself Strategically: For instants like the first dance, I use available light to my advantage. DJ spotlights, venue up lighting, or even candle clusters can provide enough illumination to help autofocus lock on consistently!
✔ Use Back-Button Focus: In extreme low-light situations, separating focusing from the shutter release allows me to lock focus once and then recompose without the camera refocusing unnecessarily!
Avoiding Camera Shake: The Role of Tripods and Stabilizers
Camera shake is the silent culprit behind countless missed opportunities in nighttime wedding photography! As shutter speeds slow to gather more light, even the slightest hand movement can introduce unwanted blur. This is where proper stabilization becomes a game-changer!
A quality tripod is indispensable for certain nighttime wedding scenarios. I rely on mine for formal group portraits in dim lighting, creative long exposures with light trails, and establishing shots of venues under the evening sky. When choosing a tripod for wedding work, I prioritize stability without sacrificing portability—carbon fiber models strike the perfect balance, offering durability while remaining lightweight enough for constant movement throughout the day!
Of course, tripods aren’t always practical, and that’s where modern stabilization technology shines! In-body and lens stabilization systems have allowed me to capture sharp images at shutter speeds as low as 1/15th of a second. To get the most out of stabilization, I focus on maintaining proper shooting posture—feet shoulder-width apart, elbows tucked in, and controlled breathing to minimize movement during exposure!
When neither a tripod nor stabilization is an option, improvisation is key! I’ve leaned against venue walls, braced my camera against doorframes, and even used tables as makeshift supports to add stability in a pinch. Burst shooting is another trick I swear by—capturing multiple frames in quick succession increases the chances of landing a tack-sharp image, as the middle frames tend to have the least movement!
One final technique? Slightly underexposing and recovering in post-processing! Modern camera sensors and RAW processing allow for impressive shadow recovery while maintaining image quality. This approach often preserves sharpness better than pushing the limits of slow shutter speeds, ensuring crisp, beautifully lit images without unnecessary blur!
Creative Composition Ideas for Capturing Unforgettable Shots
Leveraging Reflections and Shadows for Artistic Impact
Nighttime wedding photography offers a unique opportunity to play with light and darkness in ways that elevate compositions from beautiful to truly striking! Reflections, in particular, become powerful tools after dark, turning ordinary surfaces into dramatic visual elements. I’m always on the lookout for reflective surfaces—puddles after rain, polished dance floors, glass tables, or even the glossy finish of a car hood—all of which can create mirror-like effects, essentially giving you two compositions in one frame!
Water reflections deserve special attention, especially for outdoor night weddings. A simple puddle can transform into a perfect mirror, doubling the impact of string lights or venue illumination! To make the most of these shots, I position myself low to the ground and use a wide aperture to keep both the couple and their reflection in sharp focus!
Shadows can be as impactful as reflections when used with intention. Rather than avoiding them, I look for ways to integrate them into my compositions. Hard light sources—like DJ spotlights or architectural lighting—create defined shadows that add drama and mystery. Positioning couples within these shadow patterns creates an interplay of light and dark that adds depth and intrigue!
One of my favorite shadow techniques? Backlighting the couple with a strong light source to create striking silhouettes! These images emphasize shape and connection, with the couple outlined against a glowing backdrop. The trick is to expose for the background light while allowing the subjects to fall into silhouette—a simple yet dramatic composition that never fails to impress couples!
Incorporating Architectural Elements for Contextual Depth
Architectural features take on an entirely new character at night, becoming striking compositional frameworks for wedding photography! Venue lighting often highlights structural details that go unnoticed during the day, creating natural frames and leading lines that effortlessly draw attention to the couple.
I love using illuminated archways, doorways, and windows to frame couples, adding a sense of intimacy while creating layers within the image. The contrast between warm interior lighting and the cool tones of the evening sky naturally separates the subject from the background, making the composition feel more dimensional and immersive!
For urban weddings, cityscapes become a spectacular backdrop. Positioning couples on rooftops, balconies, or terraces with glowing skylines behind them creates an effortlessly romantic setting! The tiny points of distant lights form a dreamy bokeh effect when shot with a wide aperture, adding texture and ambiance to the scene—all without needing extra equipment!
Don’t overlook vertical architectural elements like columns, staircases, and tall windows. These features create natural leading lines that guide the viewer’s eye directly to your subjects. Using the rim lighting technique I mentioned earlier, you can separate your couple from architectural backgrounds while maintaining the context that makes the location special.
Posing Couples for Natural and Romantic Night Shots
Posing for nighttime wedding photos requires a slightly different approach than daytime portraits! The romance and intimacy of the evening naturally lend themselves to closer, more connected poses. I guide couples into positions where they form a single silhouette—foreheads touching, bodies close, and hands intertwined—creating strong, recognizable shapes that stand out beautifully in low-light conditions!
Movement adds another layer of depth to nighttime portraits. Instead of static poses, I often have couples walk slowly toward me while keeping their connection, whether it’s through eye contact, hand-holding, or soft laughter. Using a slightly slower shutter speed allows for gentle motion blur in non-important elements while keeping their faces crisp, adding energy and emotion to the shot!
For truly unforgettable night wedding portraits, I look for areas where natural and artificial light sources intersect! The butterfly lighting technique, where the light source is positioned above the couple, creates flattering shadows and enhances their connection. This type of lighting naturally influences their posing as they instinctively orient themselves toward the glow, resulting in effortlessly romantic images!
When shooting outdoor night wedding photos, I let the surroundings inspire natural interactions. Whether it’s having the couple dance beneath café lights, walk hand-in-hand along an illuminated pathway, or share a quiet moment on a bench under the moonlight, these small movements create images that feel authentic rather than overly posed! The key is providing just enough guidance to capture flattering angles while allowing genuine instants to unfold.
Conclusion: Taking Your Wedding Photography Portfolio to the Next Level
To truly elevate your portfolio with nighttime wedding photography:
- Practice deliberately in low-light conditions before high-stakes events!
- Invest in quality gear that excels in the dark—fast lenses are a must!
- Develop a workflow for quickly adjusting settings as lighting changes!
- Build a set of go-to lighting setups that you can execute efficiently!
- Train your eye to find or create light in seemingly dark environments!
Couples aren’t hiring you for your technical skills—they’re investing in your artistic vision! The most compelling night wedding photos balance technical excellence with genuine emotion, telling a story that’s both visually great and deeply meaningful!
By learning nighttime wedding photography, you’re not only expanding your creative range—you’re giving couples a complete, unforgettable visual story of their wedding day. From the bright excitement of morning preparations to the dreamy, intimate wizardry of their evening celebration, you’ll ensure that every part of their day is captured beautifully!
Affiliate Disclosure: Some links in this post are affiliate links, meaning we may earn a commission if you make a purchase through our links, at no extra cost to you. As wedding photographers ourselves, we only recommend gear we’ve thoroughly researched or would use in our own business. Your support helps us continue creating valuable content for the photography community.

-12")


